DIY Pet Snow Globe Ornaments
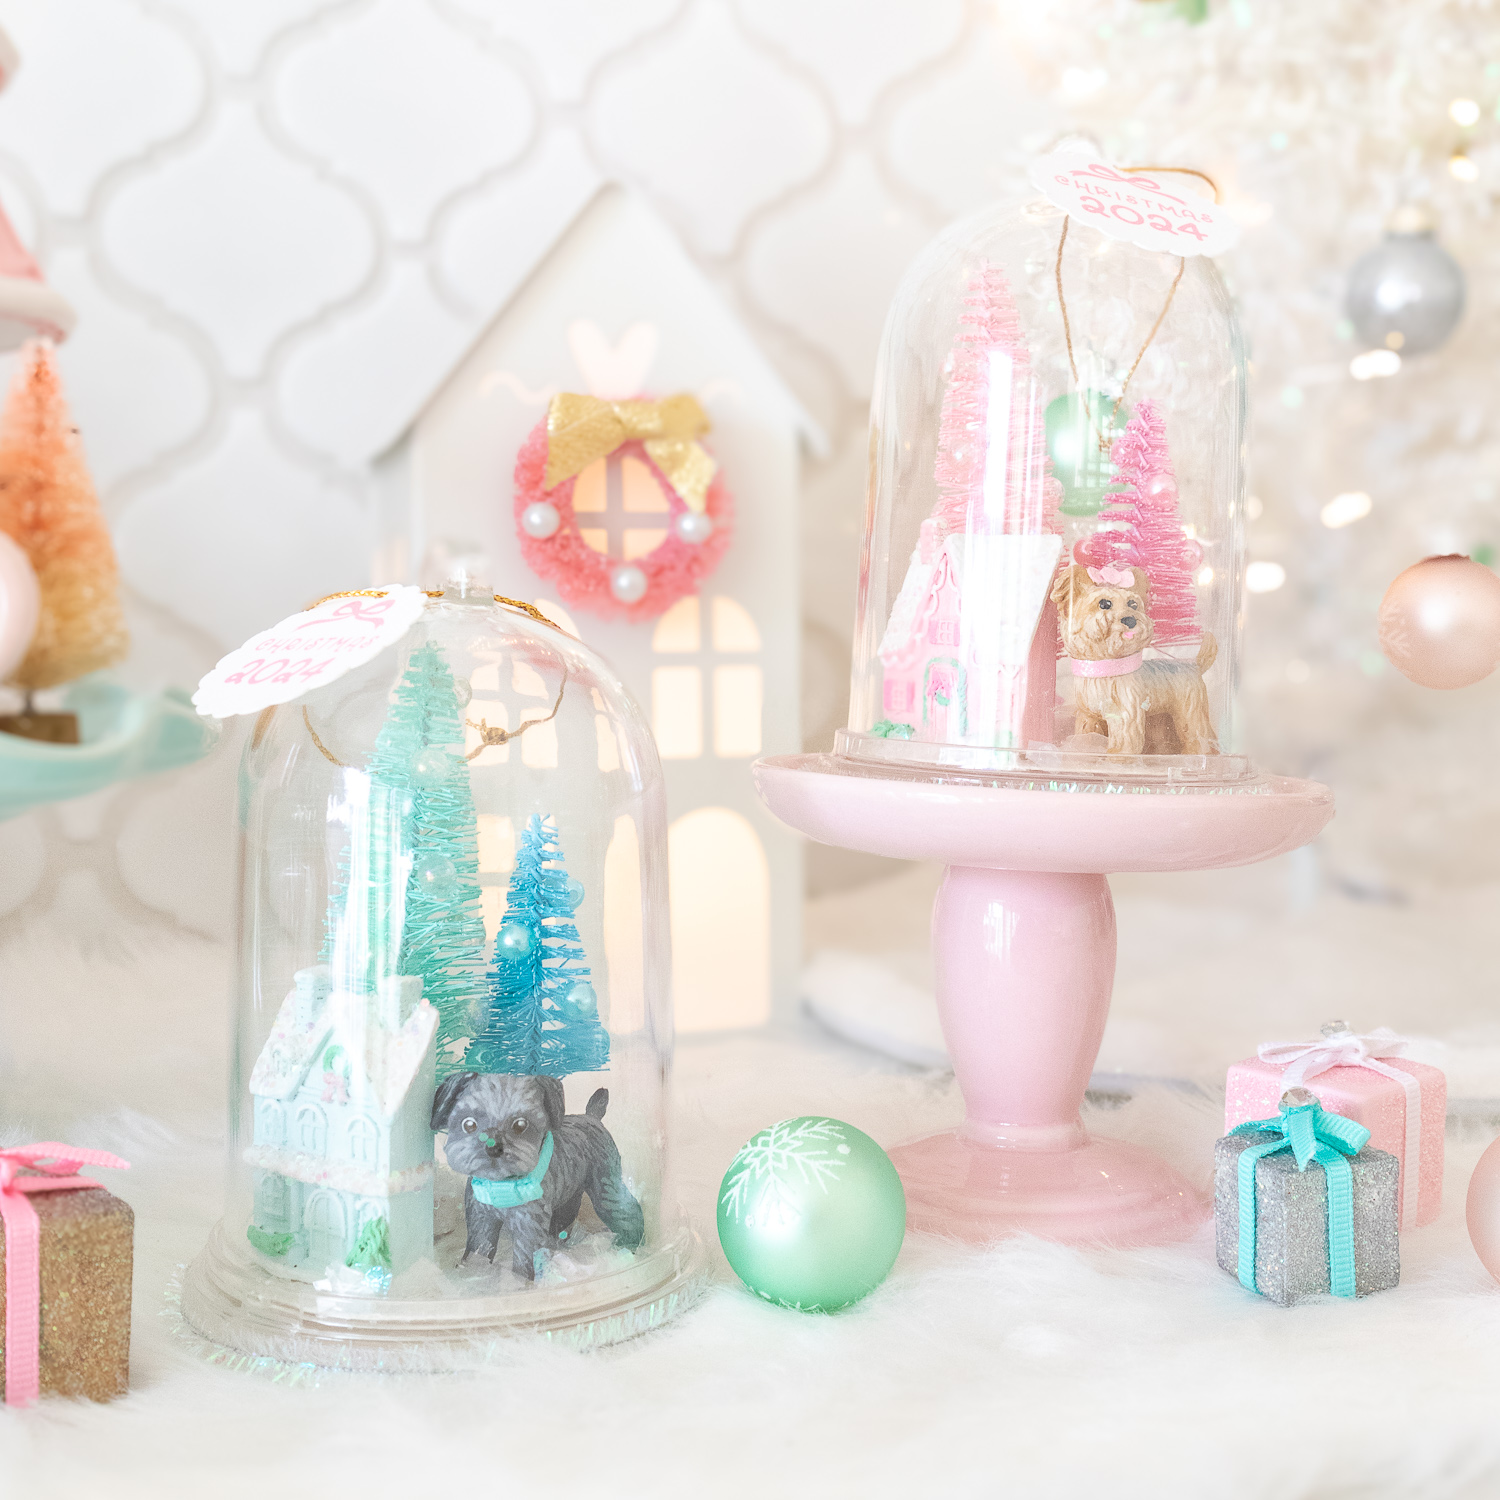
These DIY pet snow globe ornaments are the perfect holiday craft and keepsake for pet lovers!
I love collecting Christmas ornaments and some of my favorite ones are from Anthropologie. One that I keep seeing year after year are these adorable snow globe monogram ornaments. I already have one that was gifted to me a few years ago and decided I wanted to make my own versions that would match my pastel Christmas display in my kitchen. One day I got the ingenious idea of making custom snow globe ornaments for my dogs. Imagine my excitement when I found the PERFECT PET MINIATURES that were shaped EXACTLY like them!! 
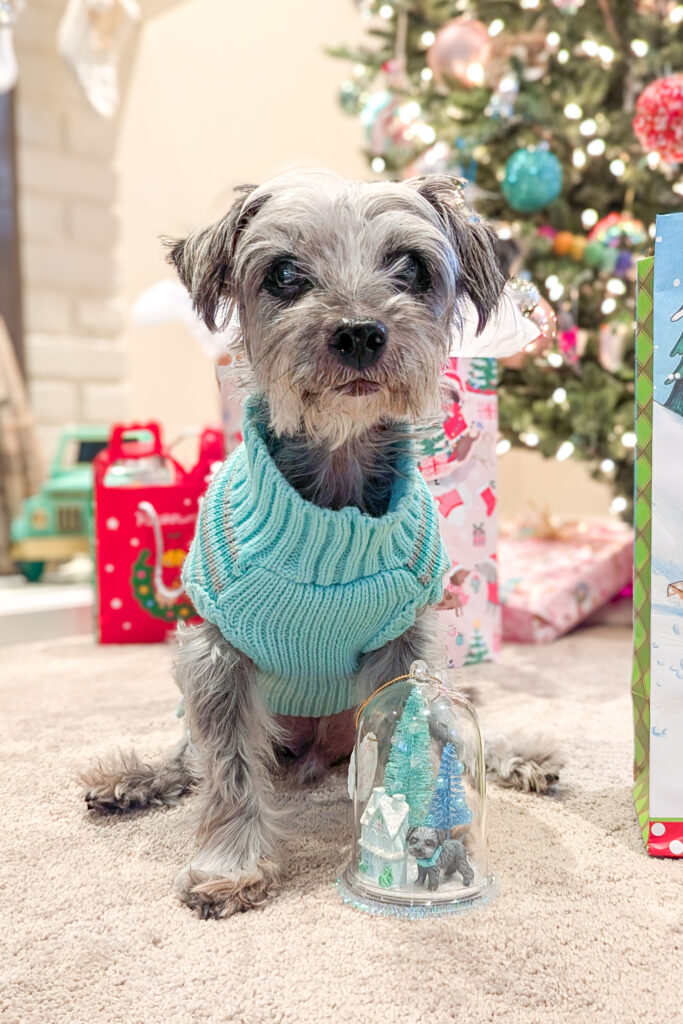
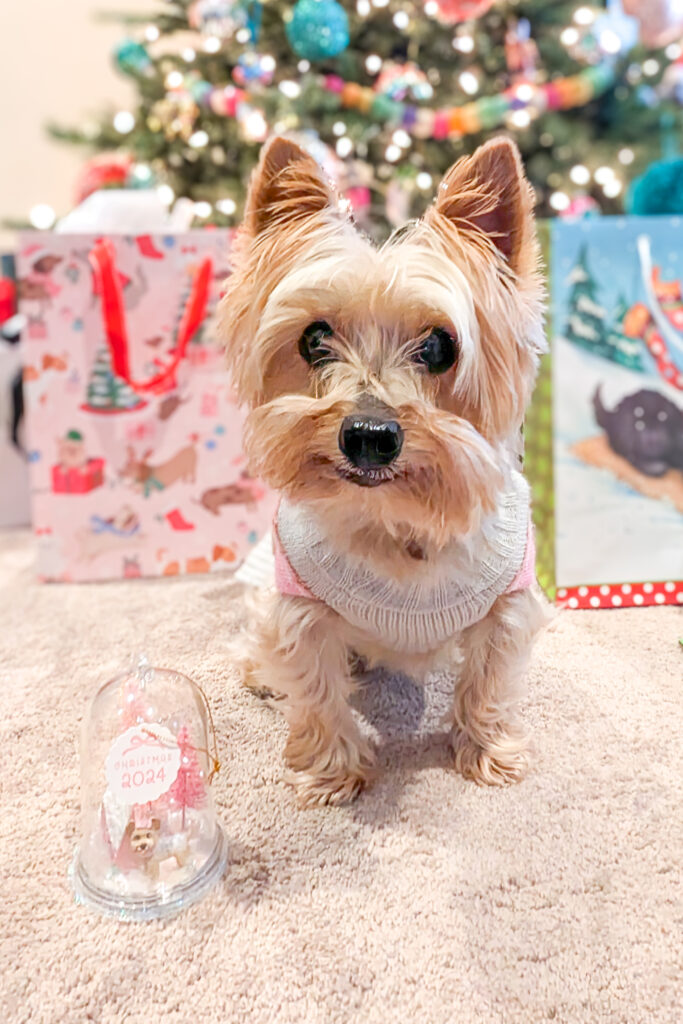
These Anthropologie inspired Christmas ornaments feature colored bottle brush trees with pearl baubles, miniature houses, and hand-painted replicas of your furry friends. This custom pet keepsake is a beautiful way to honor your beloved pets this holiday season and would make a thoughtful handmade Christmas gift for any animal lover. I especially love how you can customize the colors to match your holiday home décor!
In this blog post, l’ll guide you through creating your own DIY pet snow globe ornaments with easy-to-find materials and step-by-step instructions. Let’s make your holidays sparkle with this fun Christmas craft!
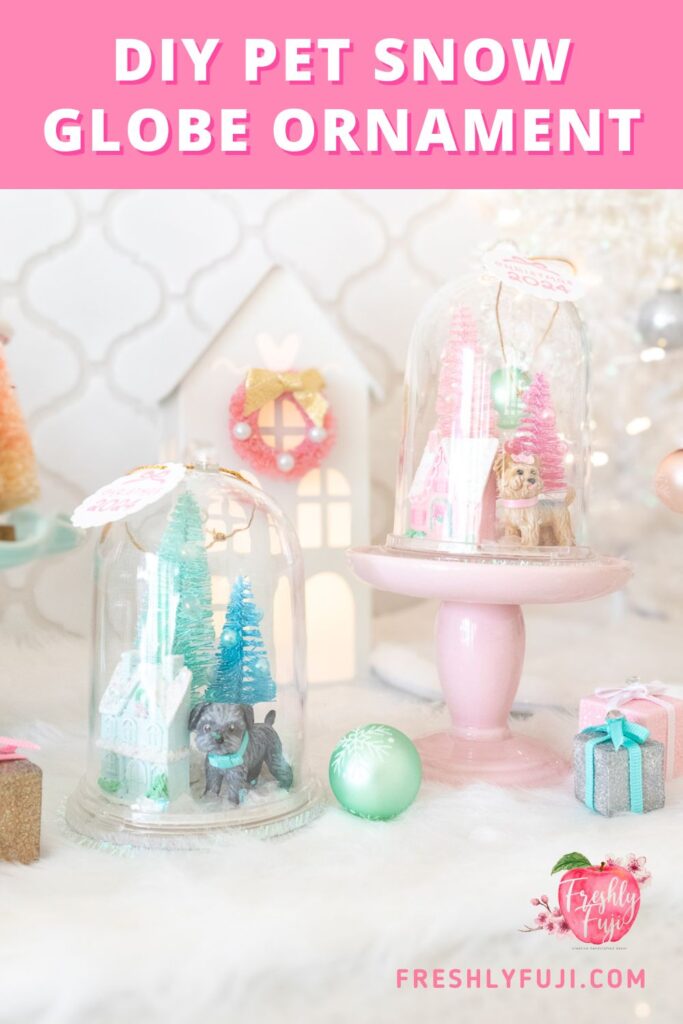
SAVE THIS PIN!
This post contains affiliate links. If clicked, I may make a small commission at no cost to you. As an Amazon affiliate, I earn from qualifying purchases.
Supplies
MATERIALS
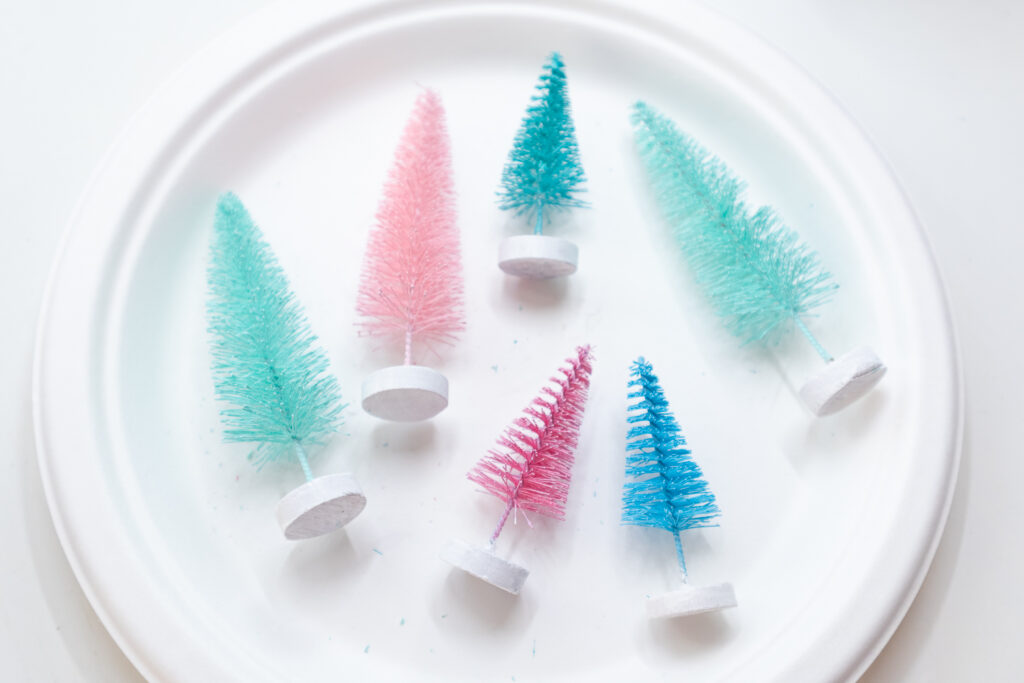
Mini bottle brush trees – I used white bottle brush trees and spray painted them. If you find colored ones you like, feel free to use those instead! For each ornament I used one tall tree and one short tree.
Spray paint – The exact colors used for the pictured ornaments are linked here: light pink, pink, aqua, light blue. (I used turquoise spray paint for another ornament and felt it coordinated well will the rest of the colors!)
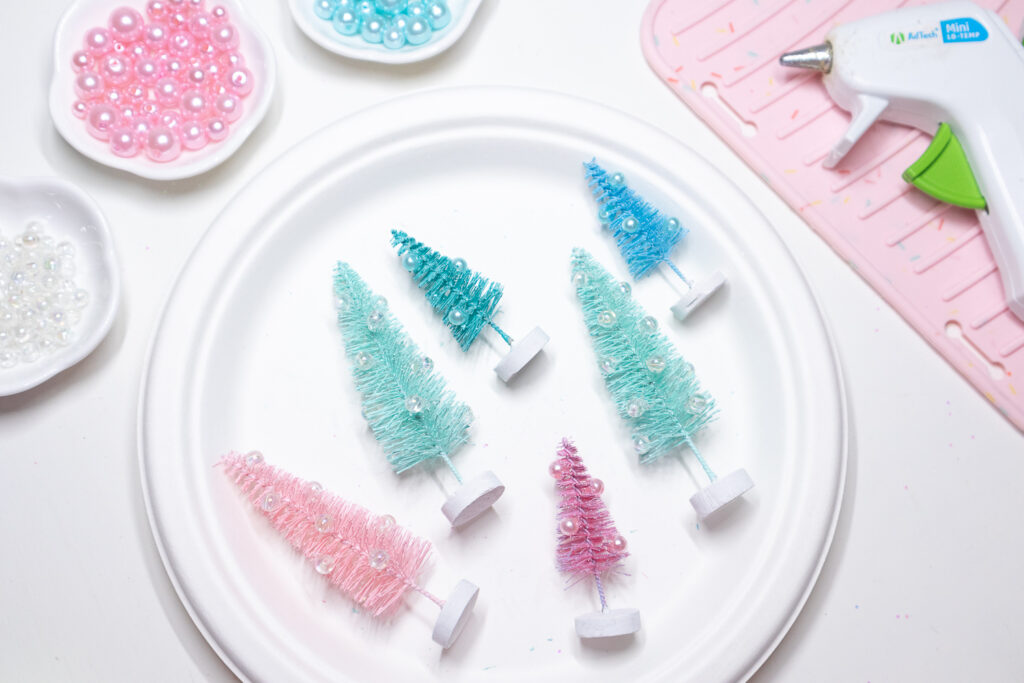
Small beads – I used an assortment of 6 mm pearl beads in pink and turquoise and clear, iridescent beads.
Miniature pet toys – The dog toys I used were found in person at Dollar Tree and are pictured below. They also had cat versions of both of these. I couldn’t find the link to the exact toys, so I’m linking this plastic toy set which is similar.
Acrylic paint – White and assorted colors
Tacky glue – This one dries super fast!
White, iridescent glitter cardstock
Grosgrain ribbon 1/8 inch – For blue dog collar on gray terrier.
Glitter faux leather – For pink collar and hair bow on Yorkie.
Gold cord
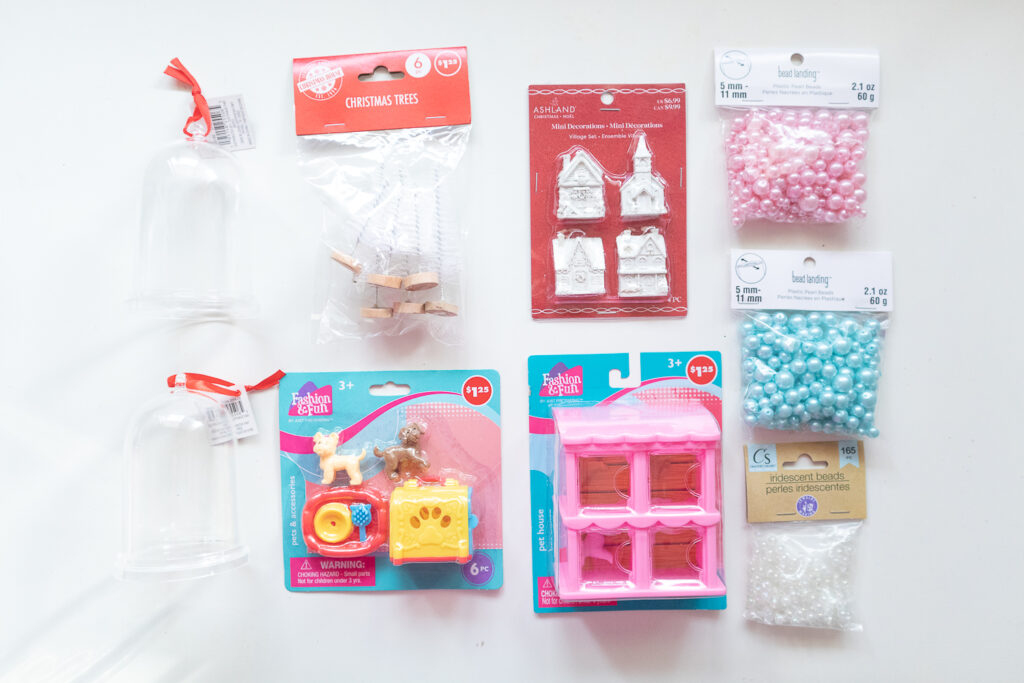
TOOLS
Masking tape
Paper plates
Tweezers
Hot glue gun + glue sticks
Spoon
Cricut machine (Explore or Maker series) – To cut circle base and create ornament tag.
How to Make DIY Pet Snow Globe Ornaments
VIDEO OVERVIEW
1. DECORATE THE BOTTLE BRUSH TREES
Spray paint trees – Cover the wood bases of the bottle brush trees with masking tape. Spray paint white bottle brush trees with your desired colors. Allow paint to dry.
Paint tree bases white – Remove masking tape from the wood bases. Paint the wood with white acrylic paint. Allow paint to dry.
Place beads the trees – Apply beads one by one onto the trees. To do this, apply a small dot of hot glue onto your tree then use tweezers to place the beads into position. Be sure to rotate the beads so the holes are not facing outwards.
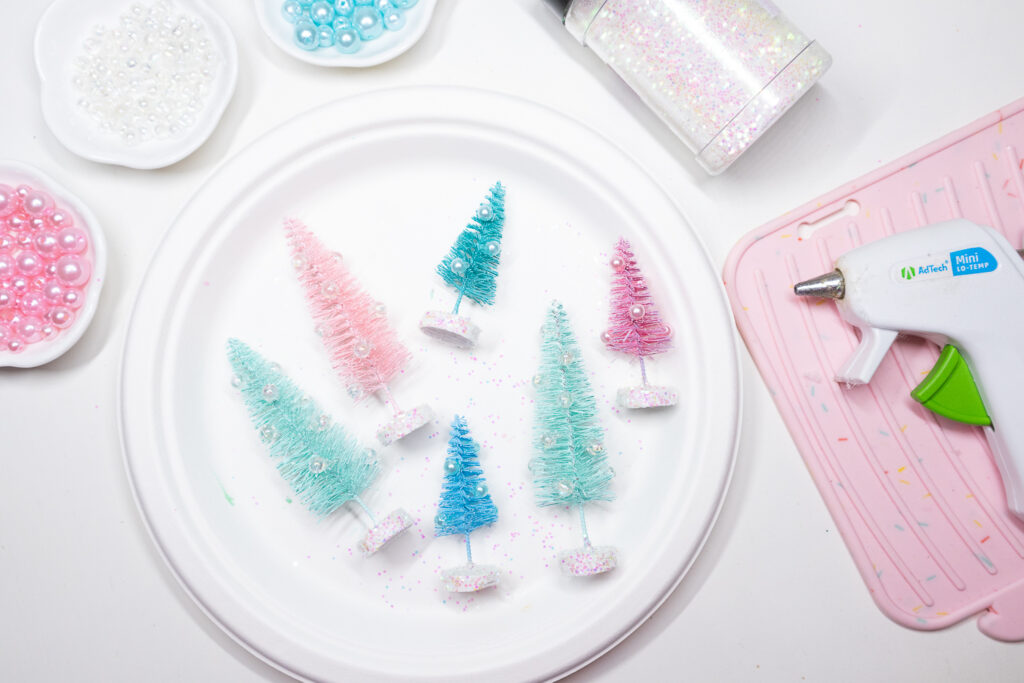
Apply glitter onto the tree bases – Apply a thin layer of tacky glue to the exposed portion of the wood base using a small paint brush. Sprinkle iridescent glitter all over the sticky base. Tip: Fold a piece of paper to place under the trees to catch glitter fallout. Once you’re done with the glitter, fold the paper and pour the excess back into the container.
2. DECORATE THE MINIATURE HOUSES
Prepare paint palette – Squeeze blobs of acrylic paint into your paint palette. Mix your desired colors for the houses.
Paint houses – Begin by painting the larger surface of the house. Allow to dry before painting on smaller details. I painted the roof white to look like snow. Allow paint to dry.
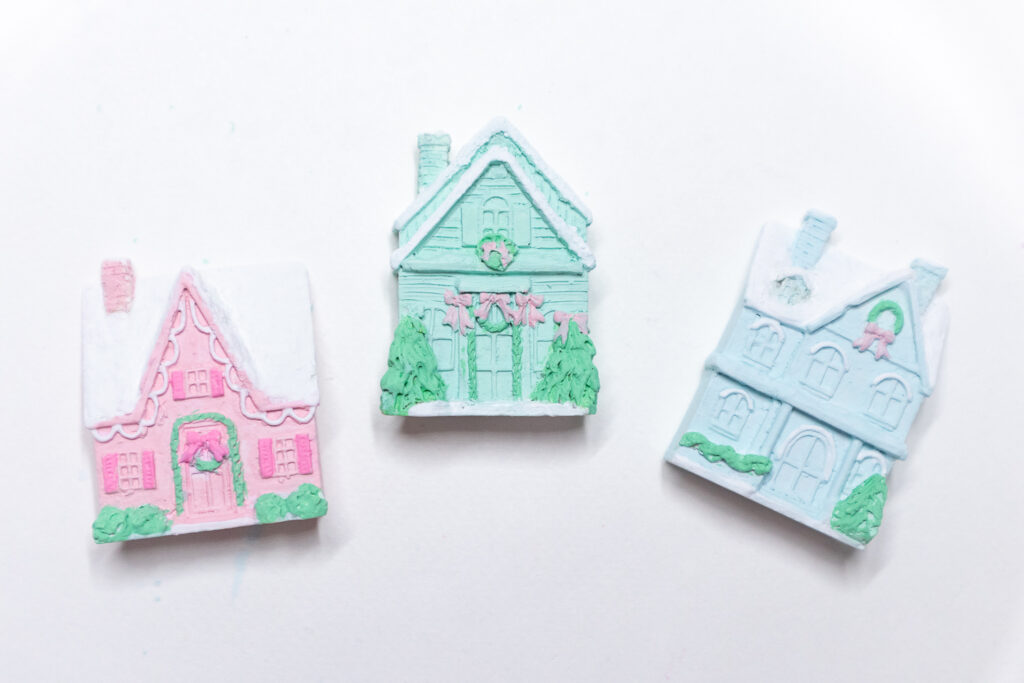
Apply glitter “snow” – Apply a thin layer of tacky glue to the white roof portion of the house using a small paint brush. Sprinkle iridescent glitter onto the roof and shake off any excess. Allow to dry.
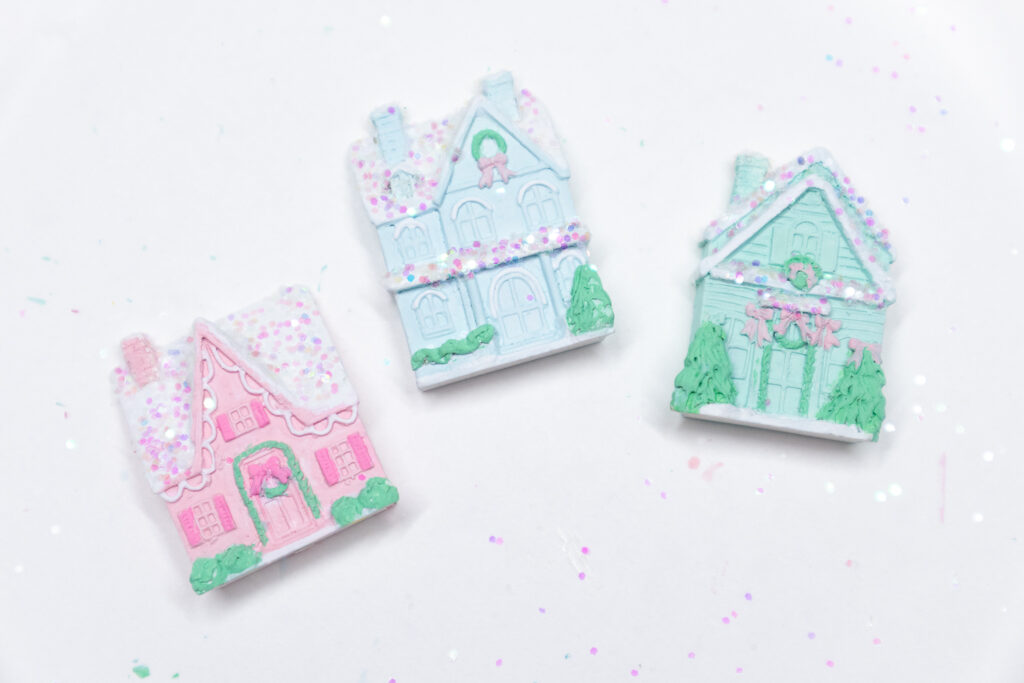
3. PAINT THE MINATURE PET TOYS
Prepare paint palette – Squeeze blobs of acrylic paint into your paint palette. Mix your desired paint colors. It helps to have a photo of your pet nearby to help you mix the perfect shades!
Paint the body – Start by painting the base of your pet with a solid color. Then use various shades and small brush strokes to create a furry texture. Finally add the smaller details (eyes, nose, tongue) with a tiny paint brush. Allow paint to dry. Tip: Use a hairdryer to speed up drying between layers.
Add accessories (optional) –
- For Penny’s (tan yorkie) miniature, I made a collar and hair bow using glitter faux leather. The collar was made by cutting a very thin strip of faux leather and wrapping it around the neck. The bow was cut by hand (a back bow shape and a circle). Both were secured with a small dot of hot glue.
- For Frankie’s (gray terrier) miniature, I made a collar with a bow using turquoise grosgrain ribbon. First I made a tiny bow and glued it on to the end of the ribbon. Then I wrapped the ribbon around the neck and secured it with a dot of hot glue.
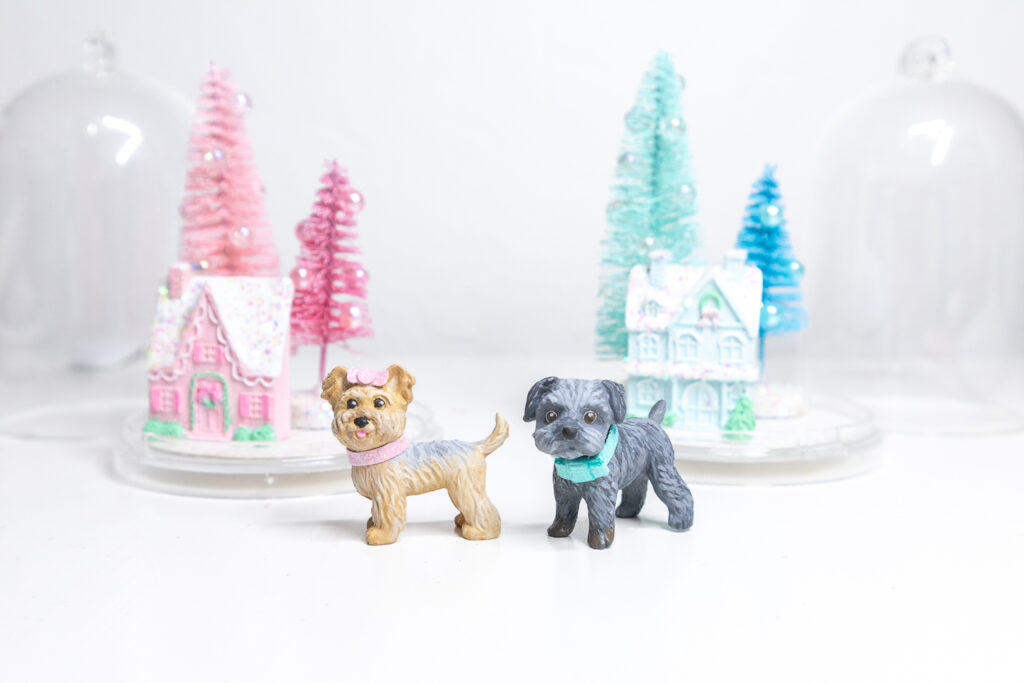
4. CUT OUT SNOW BASE AND MAKE ORNAMENT TAG
I’ve designed a FREE design file for you in Cricut Design Space! It includes a circular “snow” base that fits perfectly into the bottom of the plastic cloche ornament and a scalloped gift tag that reads “Christmas 2024” (you can alter this as needed).
To make as is: Click on the button above to open Cricut Design Space, then click on the “Make It” button. Follow the prompts for the ornament tag and print out the design on white cardstock. Load the printed cardstock onto your mat to cut it out with your Cricut. The snow base (2.4 inch round circle) will be cut next from white glitter cardstock.
To alter the text on the gift tag: Click on the button above to open Cricut Design Space, then click the “Customize” button. Select the ornament tag (it says “Christmas 2024”) and unflatten it. Alter the text or date as desired. Then select all of the elements (eg. tag, bow, text) and select “flatten” to prepare it for the Print Then Cut process. Follow the instructions above to create your ornament tag and snow base.
5. ASSEMBLE ORNAMENT
Apply “snow” base – Remove the top cloche part of the ornament. Apply hot glue to the back of your white glitter cardstock circle and place it in the center of the ornament base. Allow to dry.
Attach trees, house, and miniature pet – Before gluing anything down, place your pieces on the base and add the top cloche part of your ornament to check everything will fit. My larger tree was a bit too tall, so I had to cut the wire (with a wire cutter) and reattach it to the base with hot glue. I ended up painting the hot glue with tacky glue and applying glitter to disguise it (you can’t even tell since it’s in the back!).
Once you’re satisfied with the positioning, glue down the pieces with hot glue.
Glue pipe cleaner to base – Apply a small strip of hot glue to the base of the ornament and press on the pipe cleaner. Work your way around the ornament and trim off any excess.
Attach tag and cord – Thread a length of gold cord through the top opening of the ornament. Add the tag onto the cord, then tie the two ends together in a knot.
Let it Snow! Let it Snow! Let it Snow!
Here’s a close-up of the completed project. I’m so proud of how these turned out! I love that these snow globe ornaments match my pastel Christmas decorations so nicely and that I managed to paint the miniature dog toys to actually look like my two pups. I’m not crying, you’re crying!
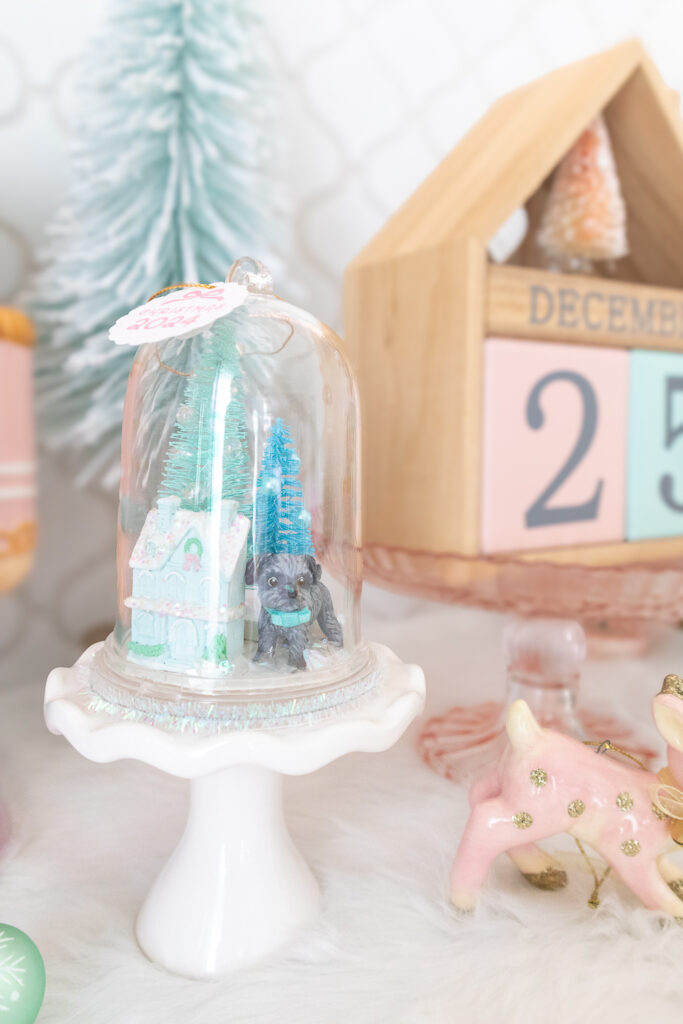
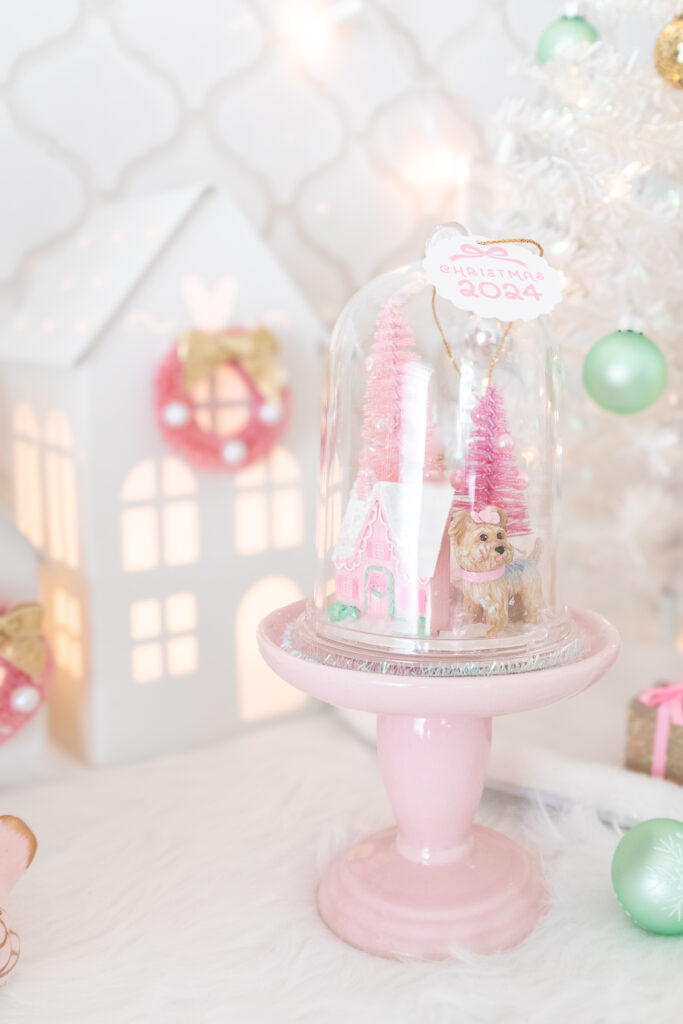
Other Variations and Ideas
CHOOSE YOUR COLORS – Use paint colors that match your holiday home décor!
ADD A LETTER – I couldn’t fit a letter in my ornament since the dog miniature took up some space. You can absolutely swap the dog for a letter if you prefer. I would cut it out from glitter cardstock for extra sparkle!
CHANGE UP THE MINIATURES – You do not need to restrict yourself to the objects I used in my snow globe ornaments. There are a ton of other miniatures that might suit your needs including this adorable die cutting machine miniature which would be perfect for Cricut crafters! For another pet snow globe ornament I gifted, I added a tiny tennis ball made from a neon pom pom.
I hope you love these DIY pet snow globe ornaments as much as I do. There is nothing sweeter than having a handmade ornament that resembles and honors your pets.
What colors would you choose for your ornament? If you end up making this snow globe ornament or something similar, tag me on Instagram so I can see it and cheer for you! Happy holiday crafting!



 Freshly Fuji (@freshlyfuji)