DIY Christmas Doormat for Pet Lovers
Some of the below links are affiliate links and if clicked, I may make a small commission at no cost to you. As an Amazon Associate I earn from qualifying purchases.
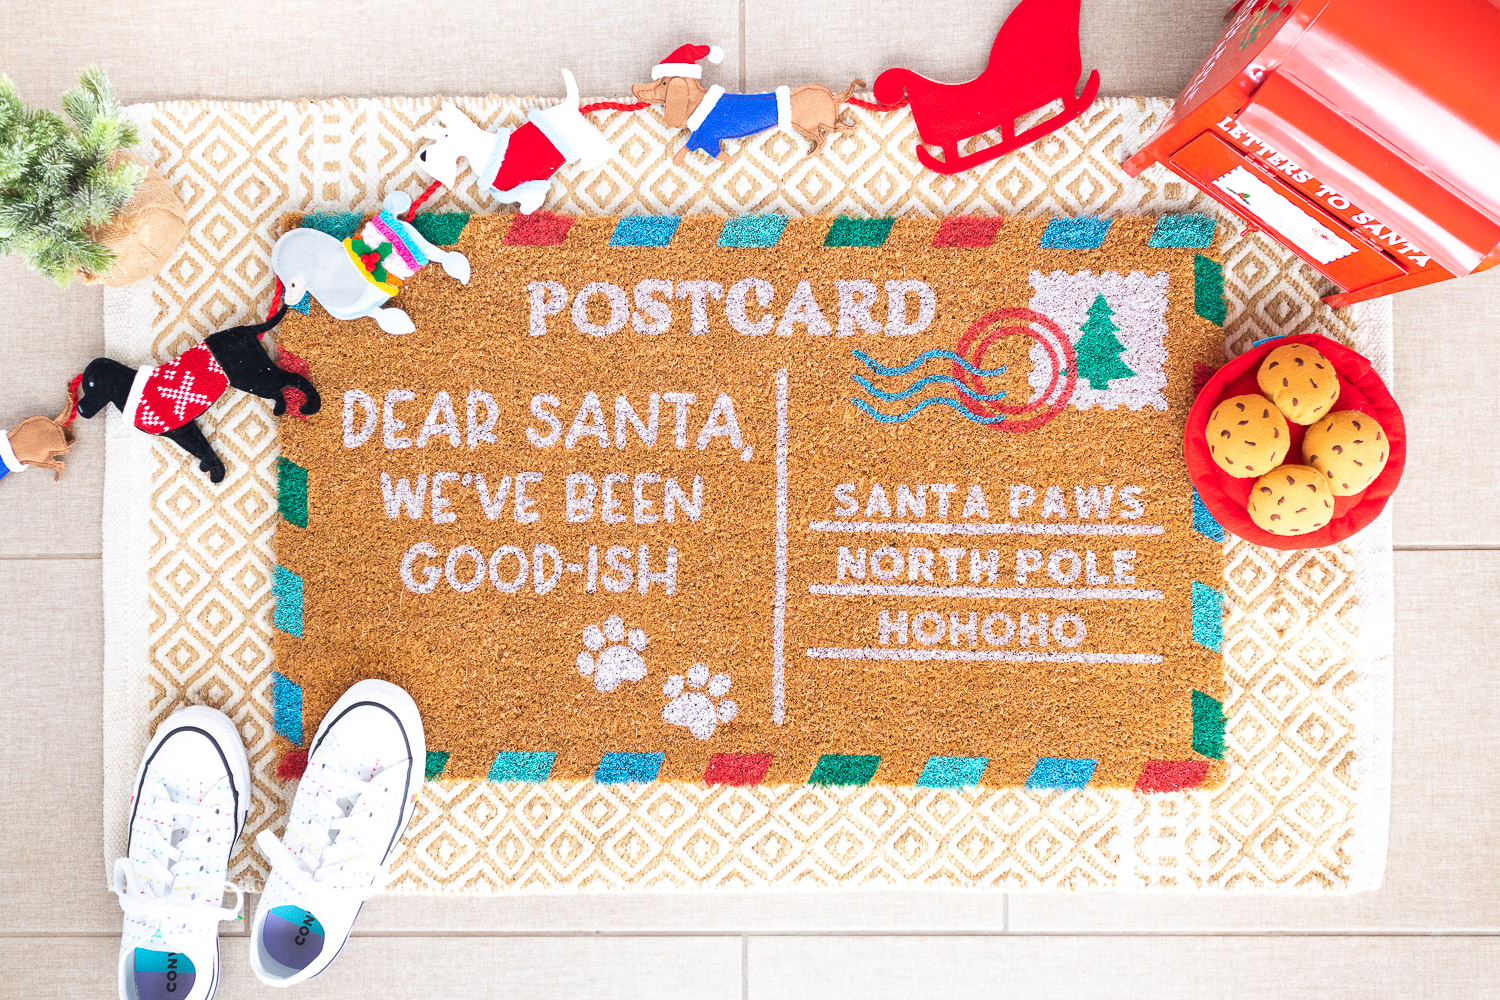
In recent years I’ve seen a lot of DIY doormats on Instagram! A lot of creators have been sharing Christmas doormats they’ve made inspired by the ones found at Anthropologie. A few years ago I picked up a blank doormat with the intention of decorating it, but guess what? I never got around to it until this year! Last month I saw this Postcard Doormat and thought it would go nicely with our existing outdoor decor, including my little red Santa mailbox!
Of course the crafty dog mom in me wanted to make my own with brighter colors and include our dogs. So I went to work in Cricut Design Space and made this pet-friendly postcard design that Santa Paws is sure to love. Now I’m sharing this tutorial and FREE design so you can make one too. This DIY doormat would make a purrfect handmade gift for dog or cat parents, or even yourself if you have fur babies!
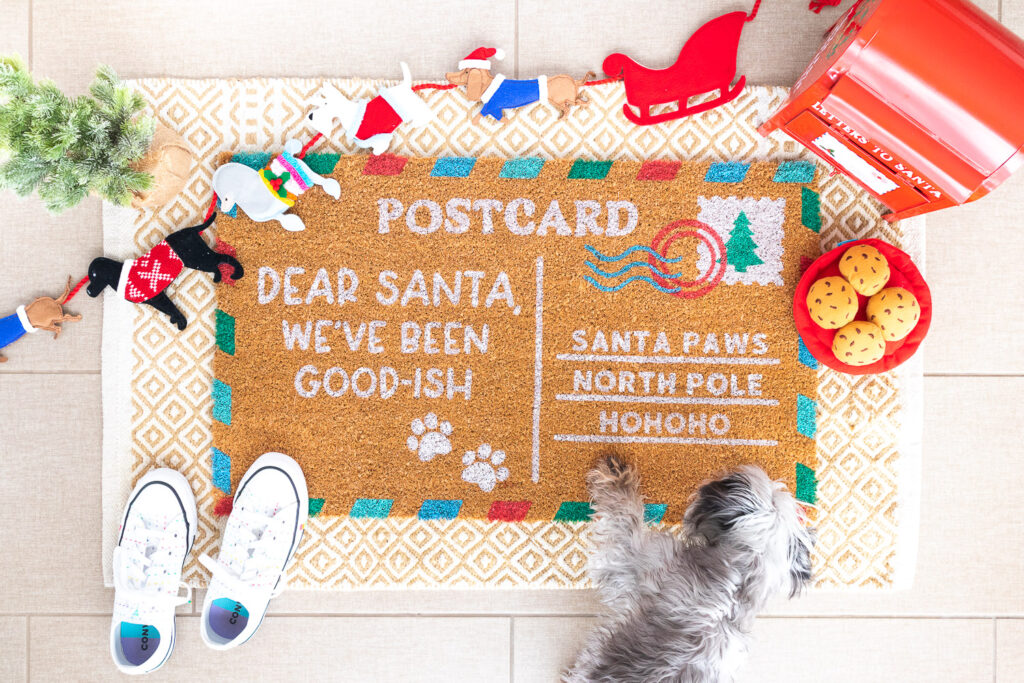
Before starting I did want to mention that this DIY doormat is an intermediate project as it does require some time, precision and patience. I opted to use freezer paper for the stencil because it’s inexpensive and I had it on hand, but it was somewhat tricky to get it to adhere to the mat. If I were to make this again I would consider using stencil vinyl. Just be aware that stencil vinyl can have it’s own issues since it’s sticky and not as easy to reposition.
Materials
Blank coir doormat 18” x 30” (I purchased mine at JoAnn, but this one looks similar)
Large format cutting machines like Explore 3 or Maker 3
Map push pins (similar) – the short height made it easy to paint around
Iron (similar)
Acrylic paint in assorted colors (I used white, red, green, turquoise, and blue)
Stencil brush (I used a ½” flat stencil brush, similar here)
Paint palette or paper plate
Instructions
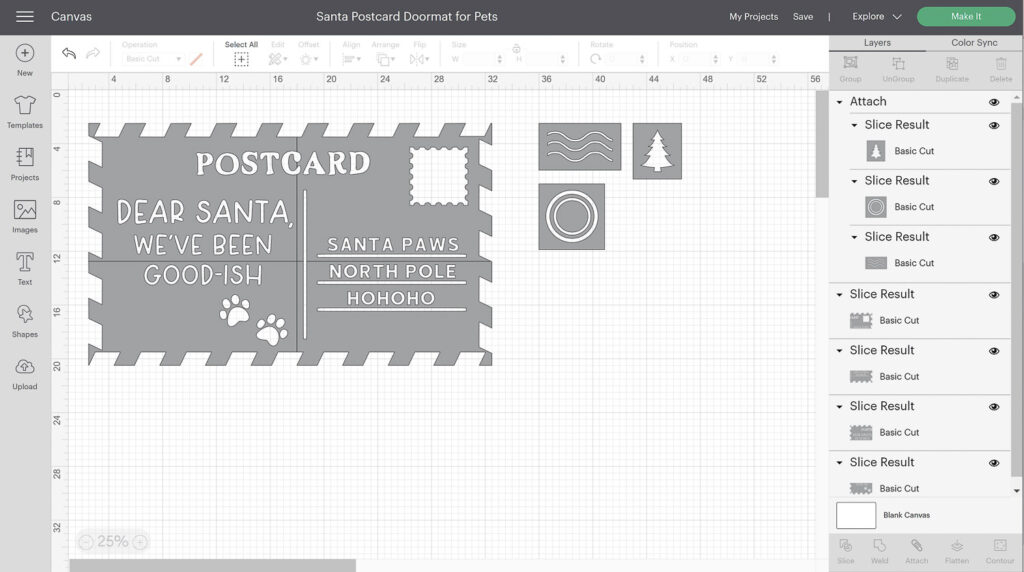
1. Click here to open my design in Cricut Design Space
You will notice that the doormat stencil is split into seven pieces (4 for the postcard and 3 for the postage designs). Since the doormat is larger than the cutting mat, the split design will allow you to cut sections of the stencil that will come together once you’re ready to use them. Select the cutting machine you’re using on the top right drop down menu then click the green Make It button.
2. Cut design
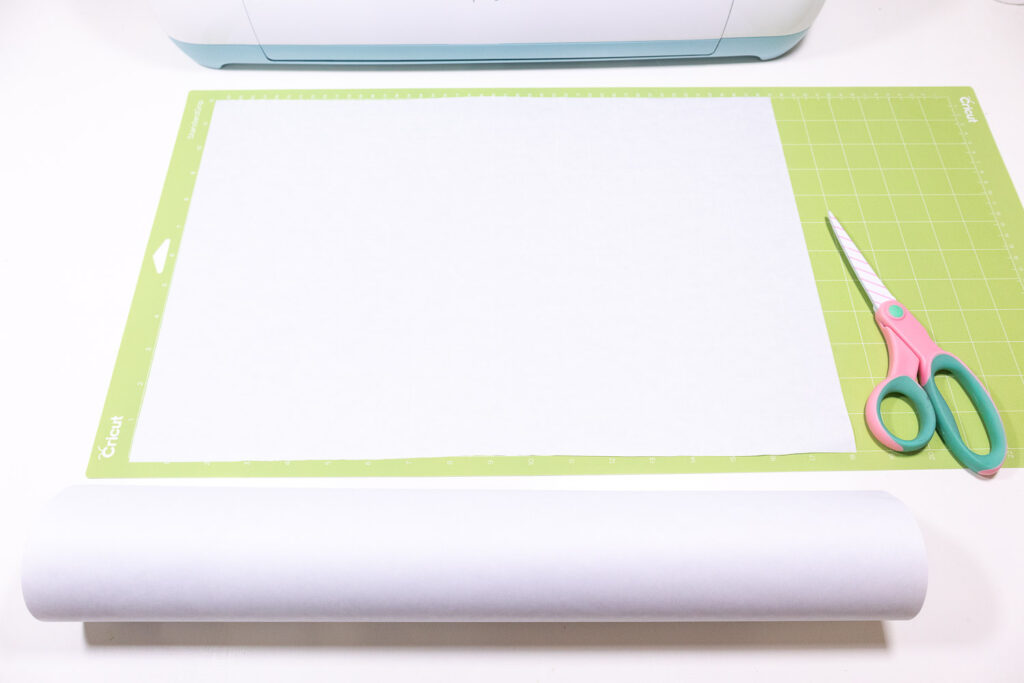
The first mat to be cut (labeled “1”) should pop up on your screen. Click the green Continue button. You’ll notice that this mat is highlighted in white on the left menu and there are four other mats below it.
Unroll the freezer paper and apply it to the cutting mat with the shiny side down. Refer to the cutting mat preview to make sure your paper will cover the section to be cut.
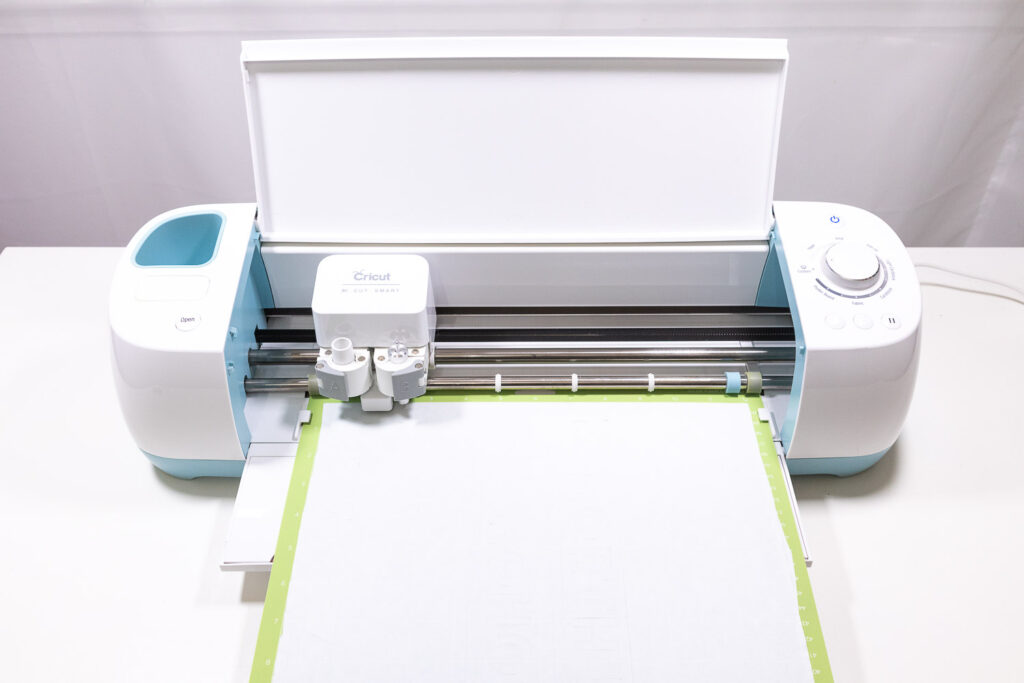
Turn the dial on your Explore Air to “Custom”. If you are not using the Explore Air 1 or 2, you will not have a dial. Keep proceeding as follows. To set the base material, click Browse All Materials and select Parchment Paper. Make sure your fine point blade is loaded in clamp B, then load your mat into your machine using the flashing arrow button. Once it’s loaded, click the flashing Go button on your machine. Your machine will begin cutting. Once it finishes cutting, press the flashing arrow button to unload the mat from your machine.
3. Weed stencil design
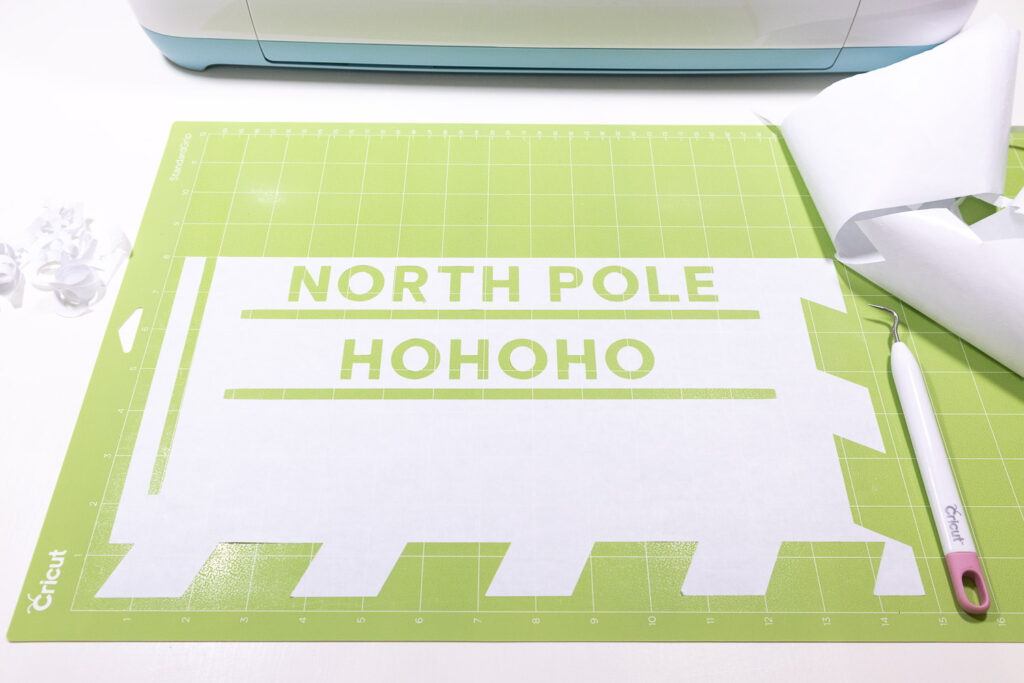
Use your weeder tool to remove the areas of the stencil that will be painted (the negative space). You can refer to the final image to help you determine which pieces need to be removed.
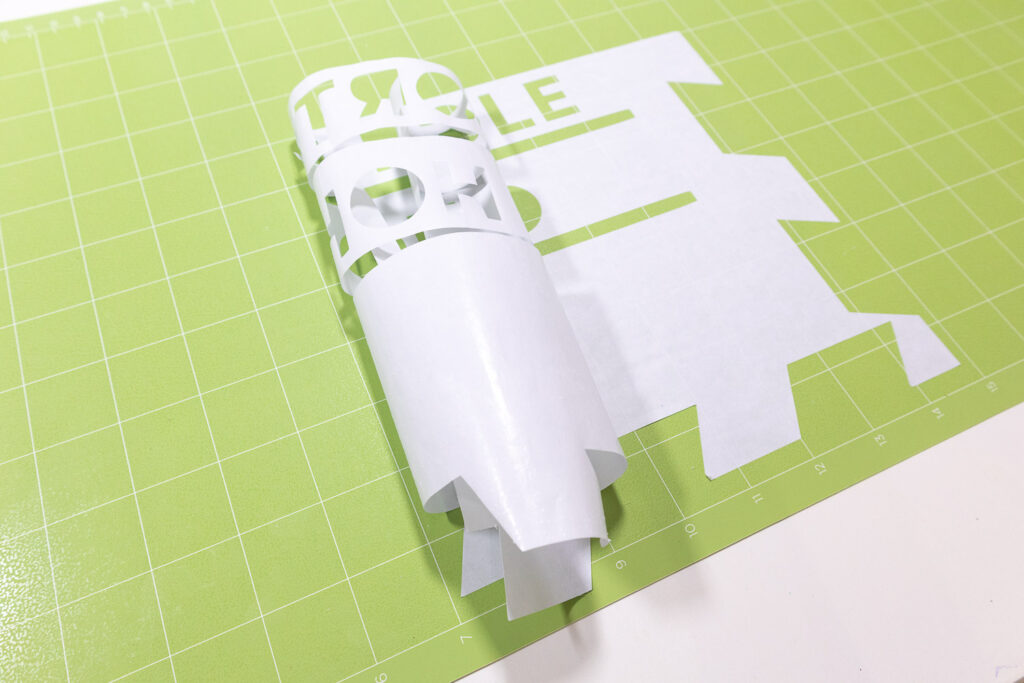
Carefully peel off the freezer paper stencil from your mat, making sure not to tear any parts. It helps to use your weeder tool to lift up the edges of the paper. Remember to save the middle of the letters (a, b, d, p, o, r) for later. I used a separate paper plate for each section of the postcard to keep the middle of the letters separated and organized.
Once you have completed this step, repeat steps 2-3 for the remaining mats. Make sure the appropriate mat is highlighted before cutting.
4. Adhere stencil to doormat
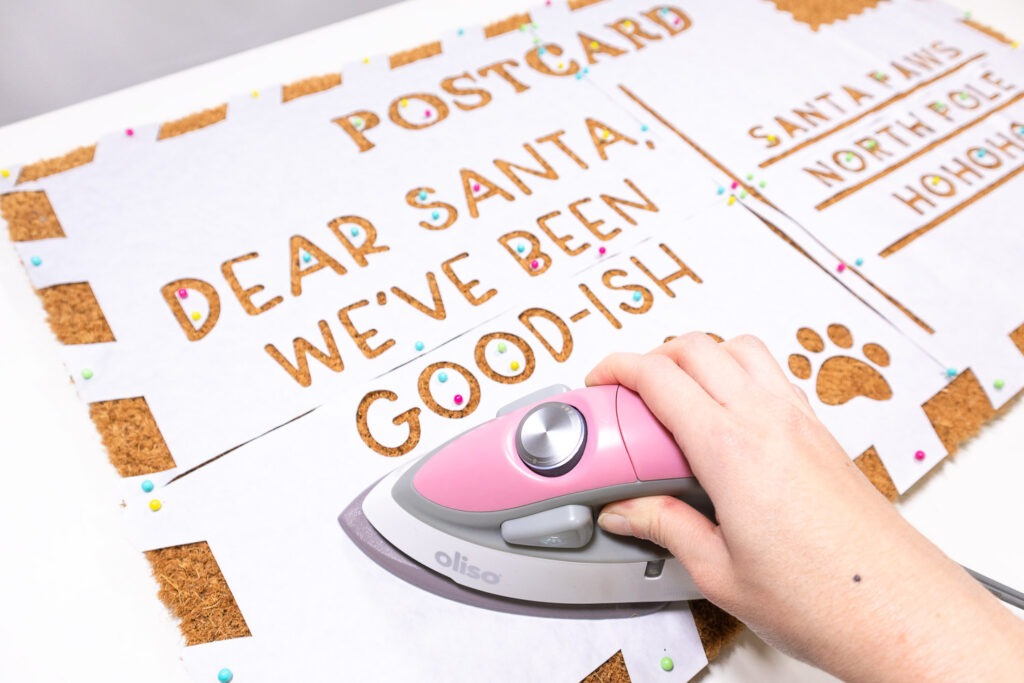
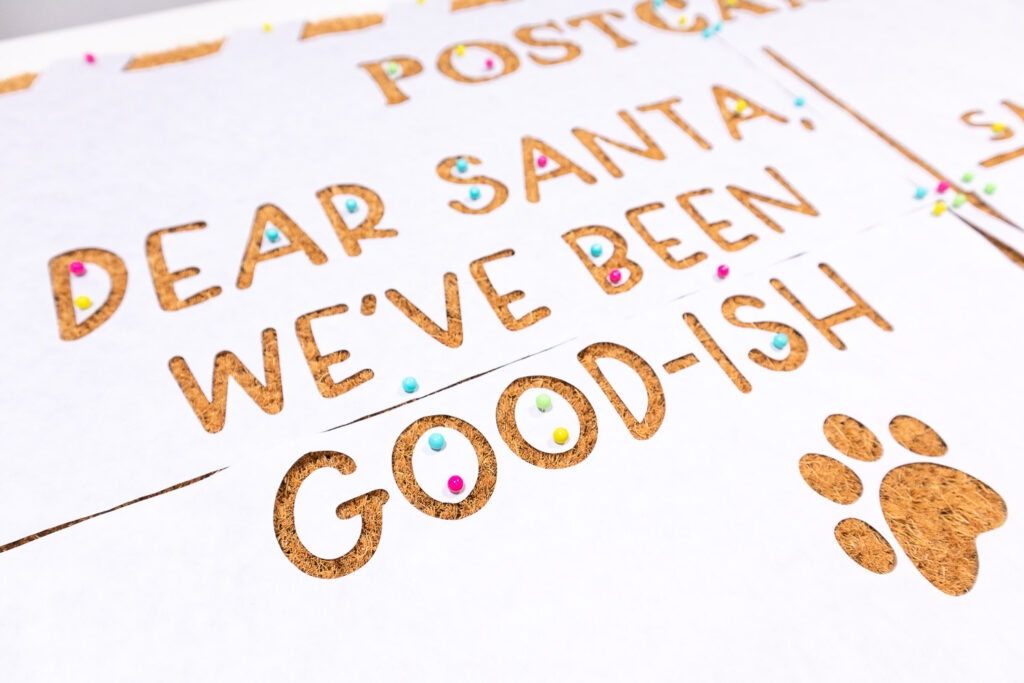
Take one of your four postcard stencils and position it to align with the corresponding corner of your doormat. Loosely pin it in place with a few push pins. Apply the other postcard stencils to your doormat the same way, repositioning and adding more pins as necessary. The edges of the stencils should touch slightly.
Once you have finalized the stencil placement, heat your iron to a medium temperature. Place the iron onto the middle of one of your freezer paper stencils. It took me about 10 seconds to melt the plastic on the back of the paper, but this could vary depending on the iron you use. Once it looks like the paper has adhered (this is a very light adhesion), lift and reposition iron. Do not slide your iron around as this could shift the stencil. I found it easiest to work from the middle of the stencil towards the outer edges. Remove the pins in the area you are ironing, making sure to replace them once that area has adhered.
Once the main part of the postcard has been attached, apply the middle of the letters you saved earlier. Use the tip of your iron to attach them to the doormat. This can be tricky since the pieces are small, so use extra pins to secure them if needed.
5. Apply paint to doormat
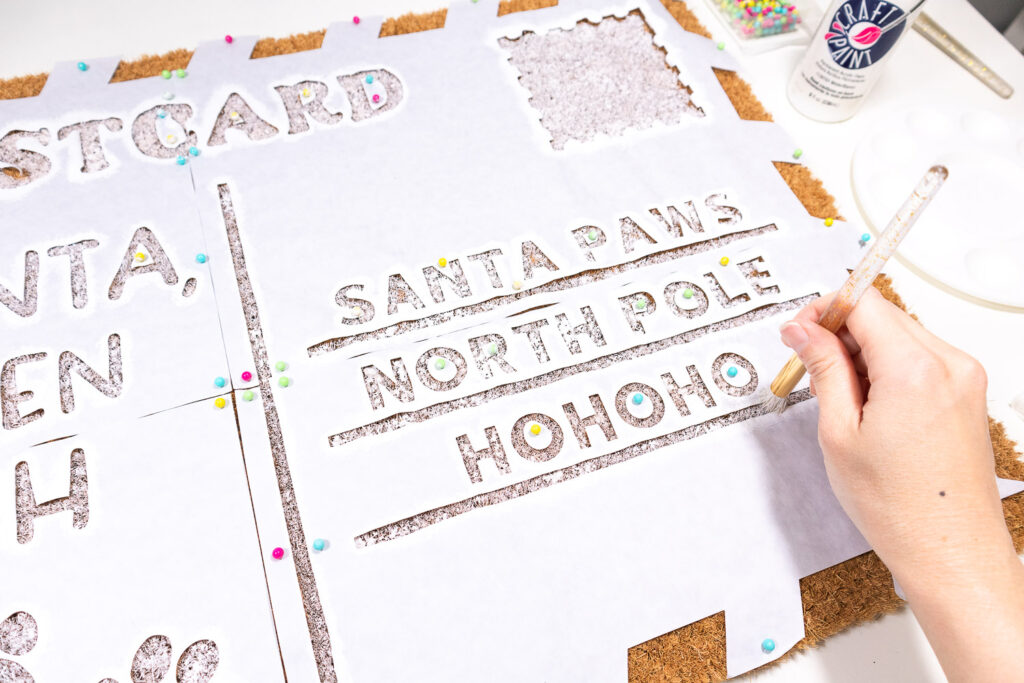
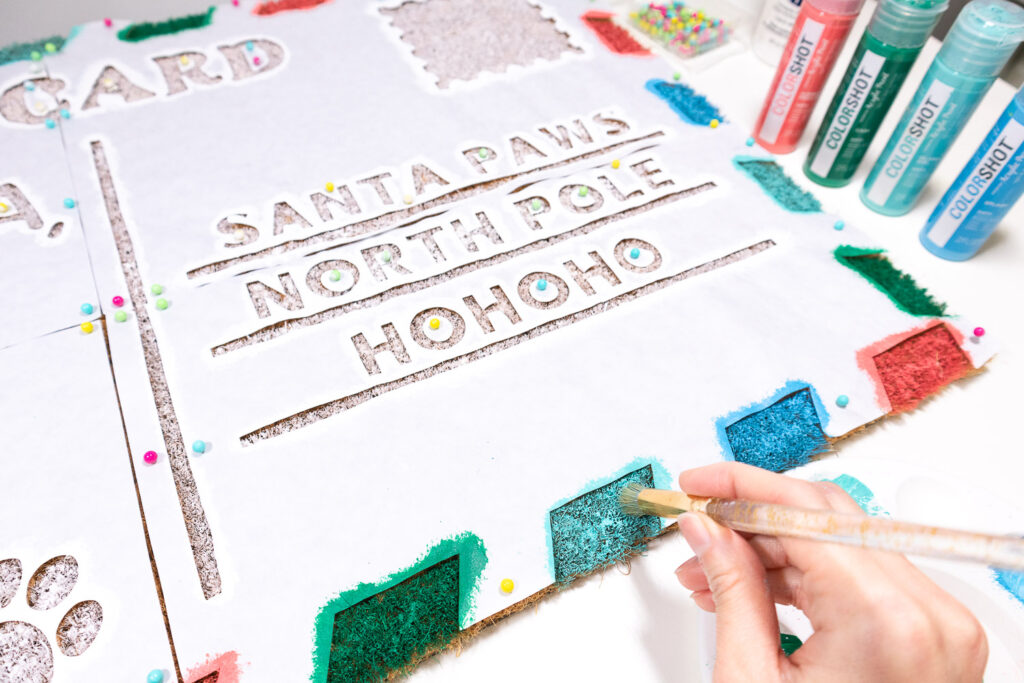
Select paint colors for your postcard. I used white for the letters, lines, paw prints, and postage stamp. I alternated four colors (red, green, turquoise, blue) for the border. Note that there are 28 parallelograms for the borders, so choose an appropriate multiple (either 2 or 4 colors) if you’re alternating colors.
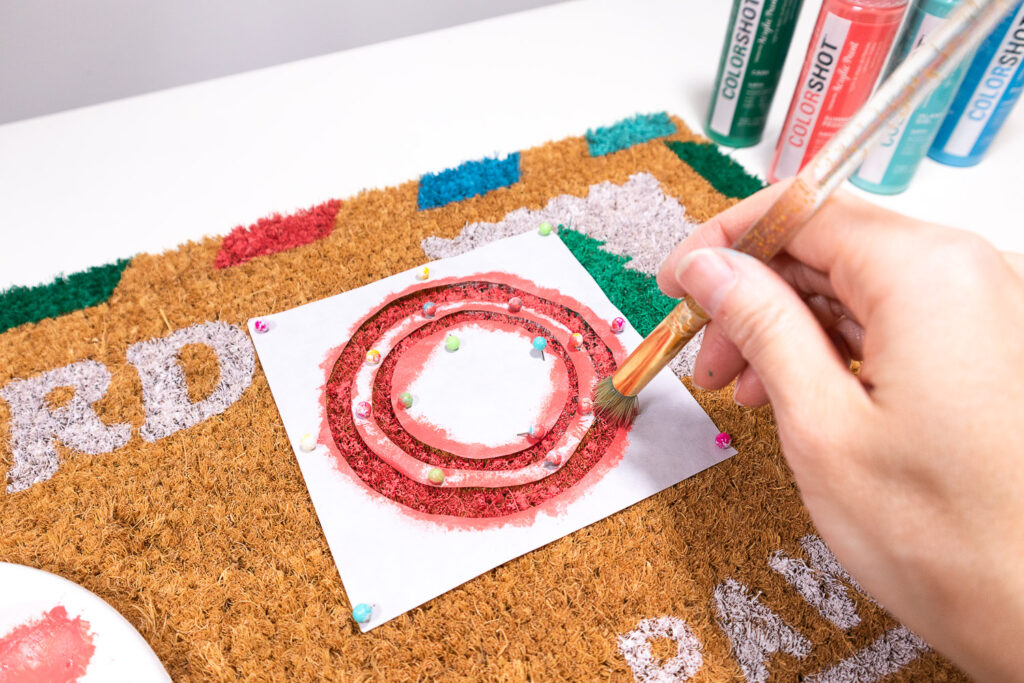
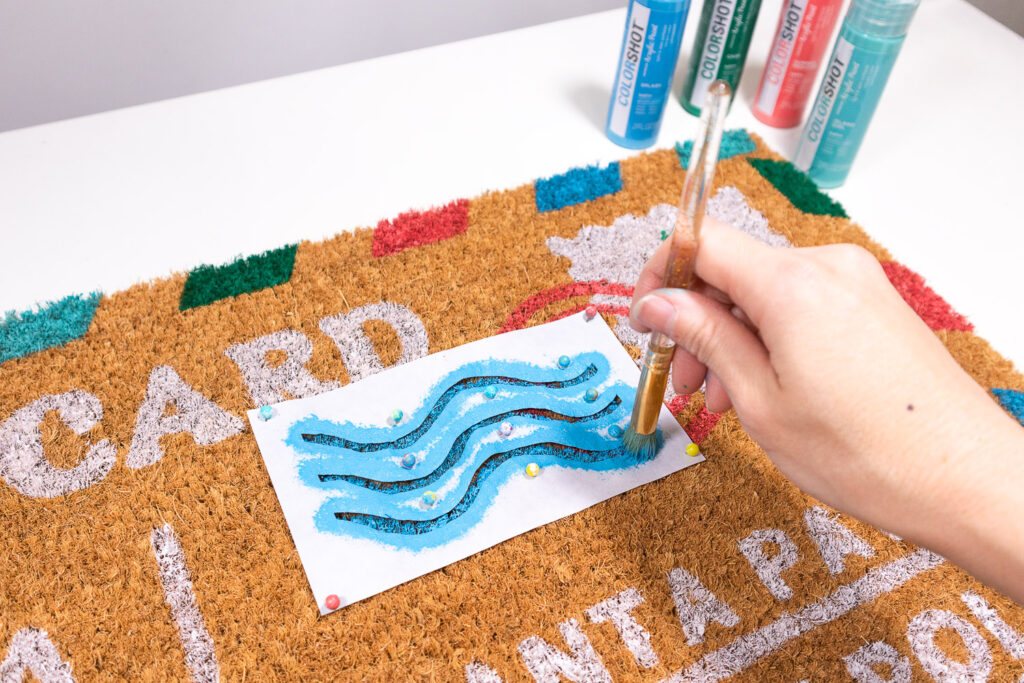
Start with the color to be used for the center of the postcard. Squeeze a blob of paint onto a paint palette or a paper plate. Dip your stencil brush into the paint and tap it into the openings of your stencil. You’ll find you need to tap pretty firmly to get the paint to seep in between the bristles of the doormat. I found that 3-4 coats were required to get the opaque and saturated finish I wanted. You can use a hairdryer to help dry the paint in between coats.
Next, work on the border of the postcard using the same method described above. If it helps, apply a small dot of paint above the shape you’ll be painting to help you maintain the alternating color pattern. Allow the paint to dry then remove the stencil paper.
6. Apply postage designs
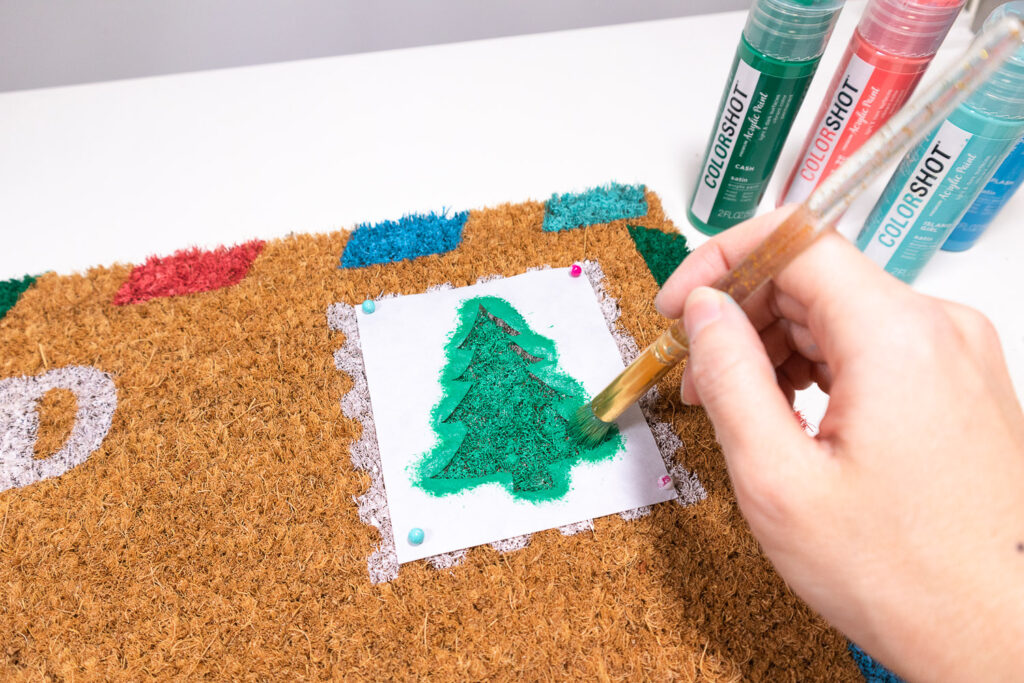
Position the tree stencil on top of the white postage stamp and use your iron to attach it to the doormat. Use pins to secure the corners. Apply your choice of paint to the tree design using the same method described in step 5. Allow the paint to dry (again, you can use a hair dryer to speed up the process) then remove the stencil.
Position the circle stencil to the bottom left of the stamp, overlapping it a little. Use your iron to attach it to the doormat and use pins to secure it in place. Apply your choice of paint to the two circles. Allow to dry then remove the stencil.
Position the wavy lines stencil to overlap the bottom left half of the circles. Use your iron to attach it to the doormat and use pins to secure it in place. Apply your choice of paint to the three wavy lines. Allow to dry then remove the stencil.
7. Apply FlexSeal clear spray
Once the paint on your doormat is completely dry, place it on a drop cloth in a well ventilated area. Following the directions on the can, apply a light coat of Flex Seal spray onto your doormat. Allow 24-48 hours to dry (dependent on weather conditions) before applying a second coat. This helps to protect your beautiful doormat from fading. Once the Flex Seal has dried, you’re ready to put it to use and impress all your guests!
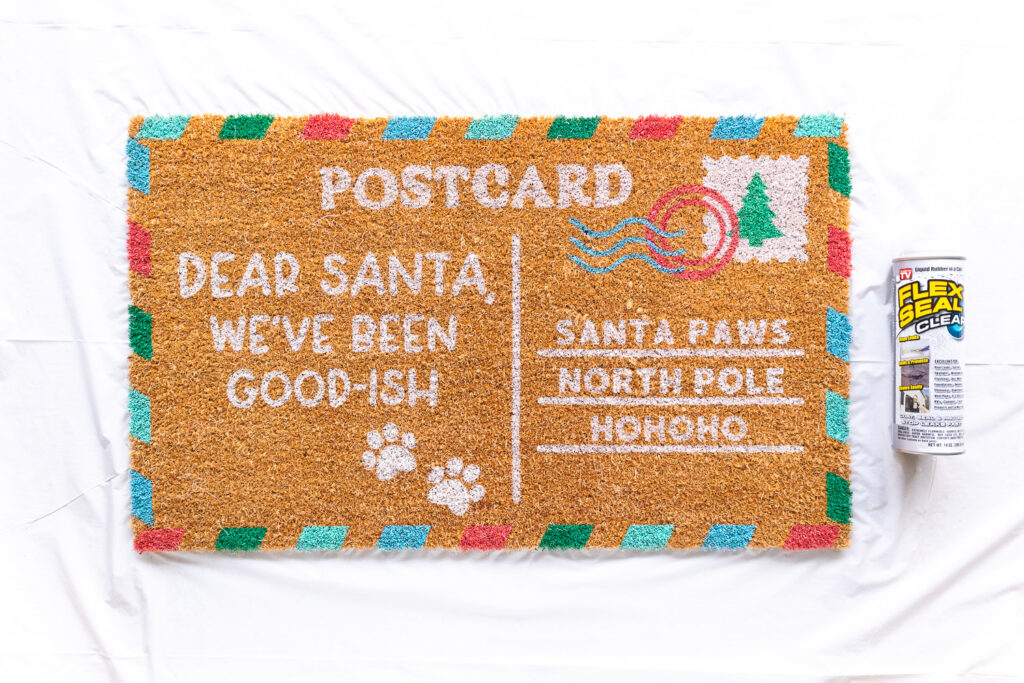
Enjoy your new doormat!
Now Santa Paws will know exactly where to stop this year! Don’t forget to snap a pic with your pups (or kitties)!
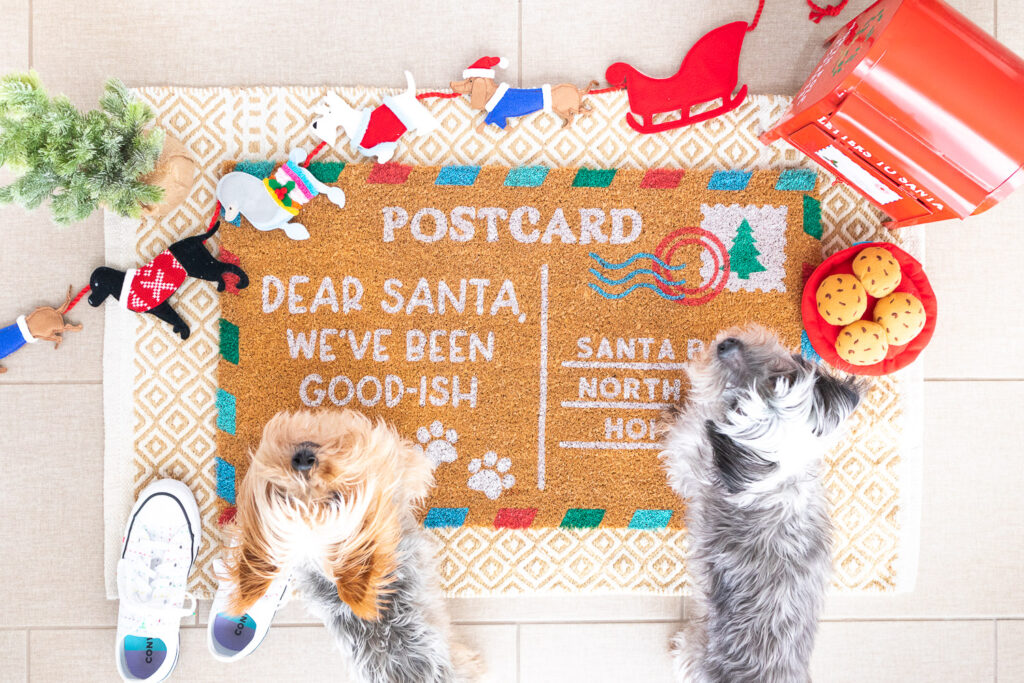
Pets are part of the family and deserve handmade gifts too! If you make this DIY doormat, write me a comment or tag me on Instagram. I can’t wait to see how yours turned out. Happy crafting friends!
If you need another project for your pups, check out my personalized dog bone pillow project.


