Peter Rabbit Wheelbarrow Diaper Cake
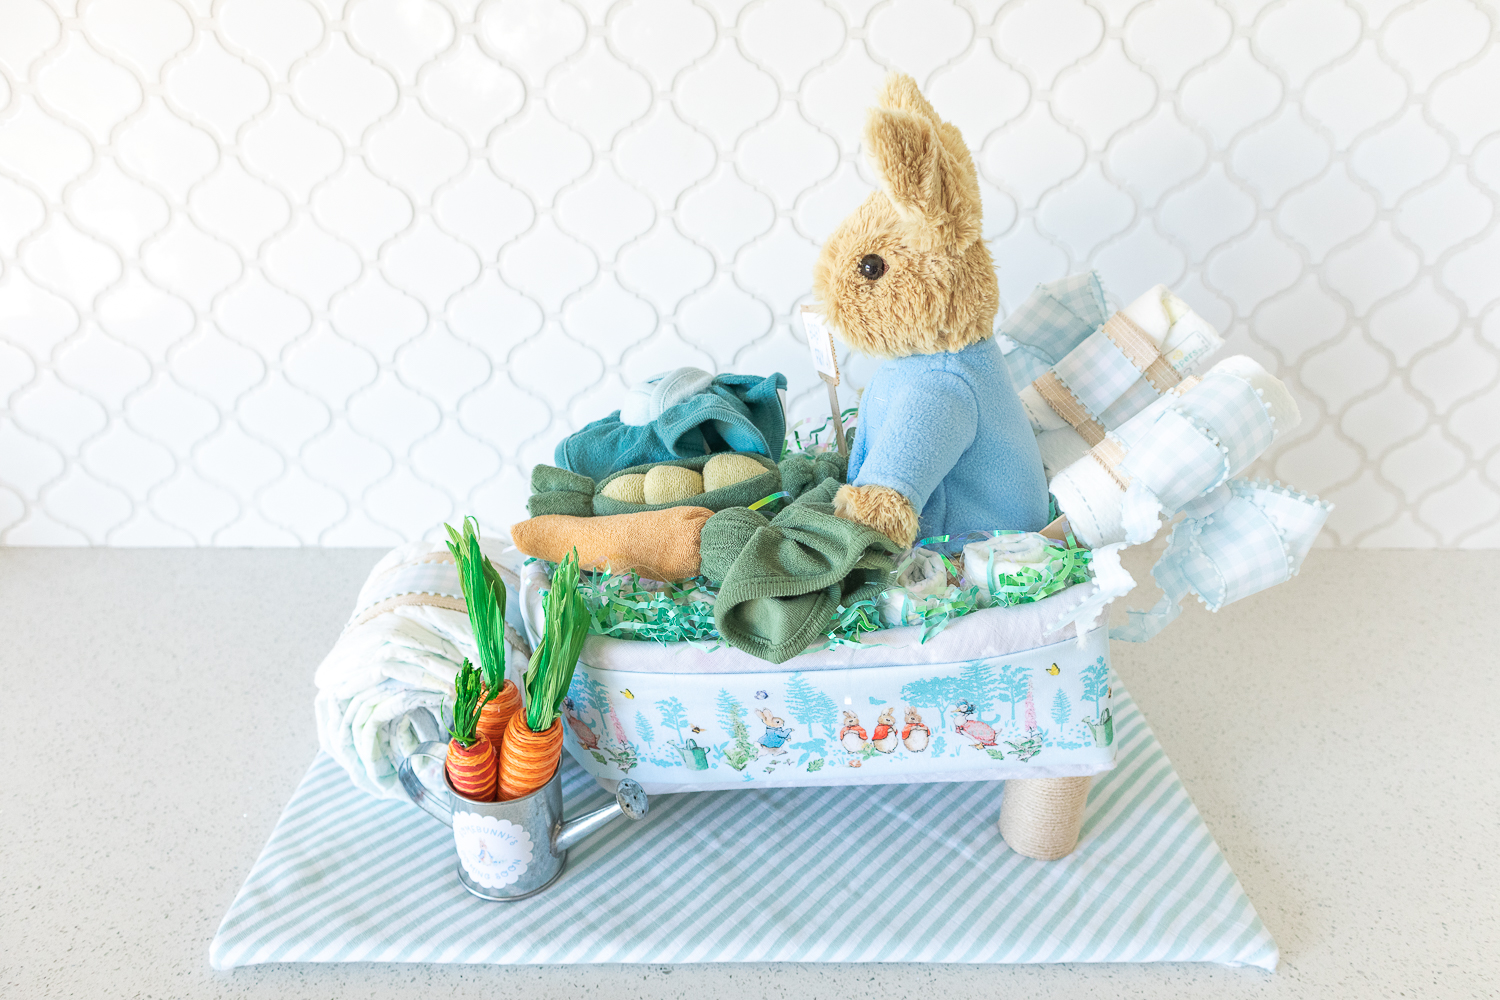
Find out how I made the cutest Peter Rabbit wheelbarrow diaper cake for a friend’s baby shower.
My friend Jenna is expecting a baby boy soon and I couldn’t help but whip up a Peter Rabbit wheelbarrow diaper cake to match her baby shower theme! Jenna is a wedding planner at Heart and Arrow Weddings and we’ve worked together on several celebrations. I’ve always admired her budget-conscious, but still beautifully decorated parties. She already has a baby girl, but friends wanted to throw a sprinkle to celebrate her and her soon-to-be baby boy. Her Peter Rabbit-themed baby shower was held in a friend’s backyard in the Bay Area this weekend and all the details were so cute!
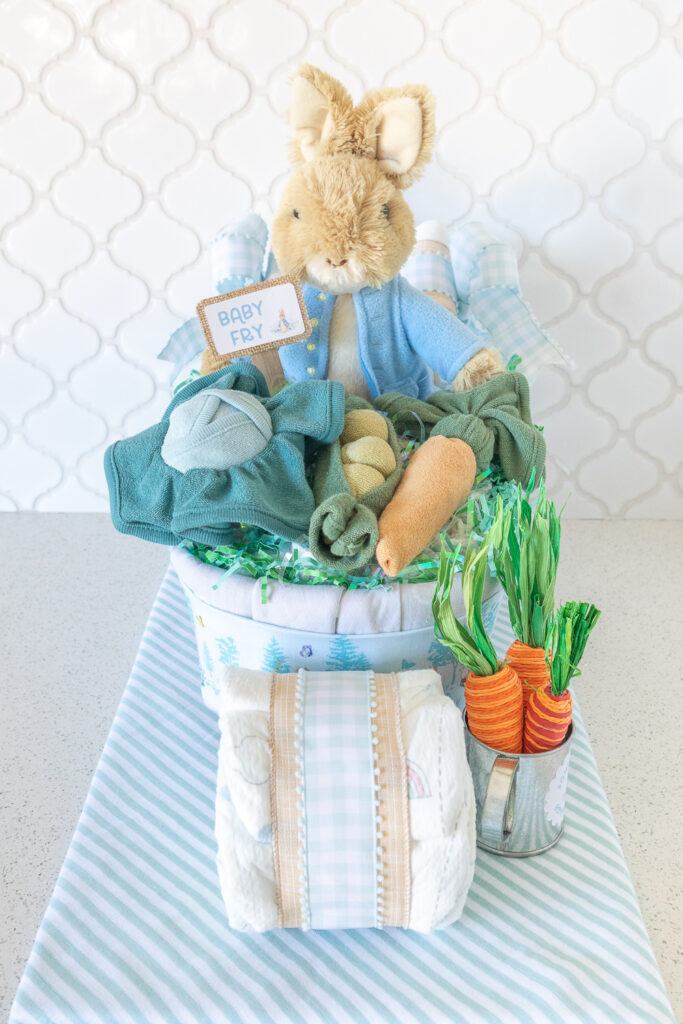
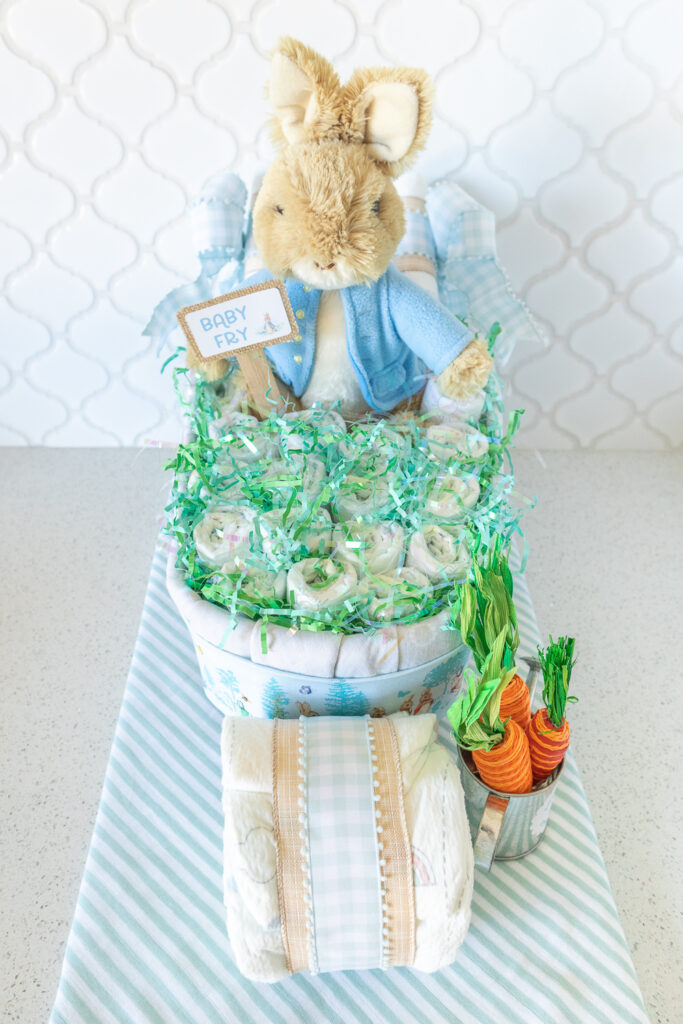
I was assigned the task of making a diaper cake and a matching banner. Diaper cakes are not my specialty, but as a bunny lover and someone born in the year of the rabbit, I was excited for the challenge to create something around her Peter Rabbit theme! The Tale of Peter Rabbit include lots of stories with gardens, so I knew I wanted to incorporate some garden elements. I found myself most inspired by the Peter Rabbit and wheelbarrow diaper cakes I found on Pinterest. Jenna already had this Peter Rabbit plush listed on her registry so I committed to incorporating it into her diaper cake. I ended up making a wheelbarrow diaper cake with Peter Rabbit sitting inside! Thoughtful details like the band of Peter Rabbit fabric, gingham ribbon bows, and mini watering can made this diaper cake even sweeter! I LOVE how it turned out and was thrilled by how well it was received by Jenna and her guests.
Looking back, I wish I had taken more pictures of the process. Sometimes taking pretty, styled photos interrupts my flow and I REALLY needed to concentrate to finish everything on time! I’ve included written instructions and multiple angles of the diaper cake in hopes that it will help you create something similar. A diaper cake like this would be so charming as a baby shower centerpiece, a nursery decoration, and/or a gift to expecting parents! Keep reading for the step-by-step tutorial!
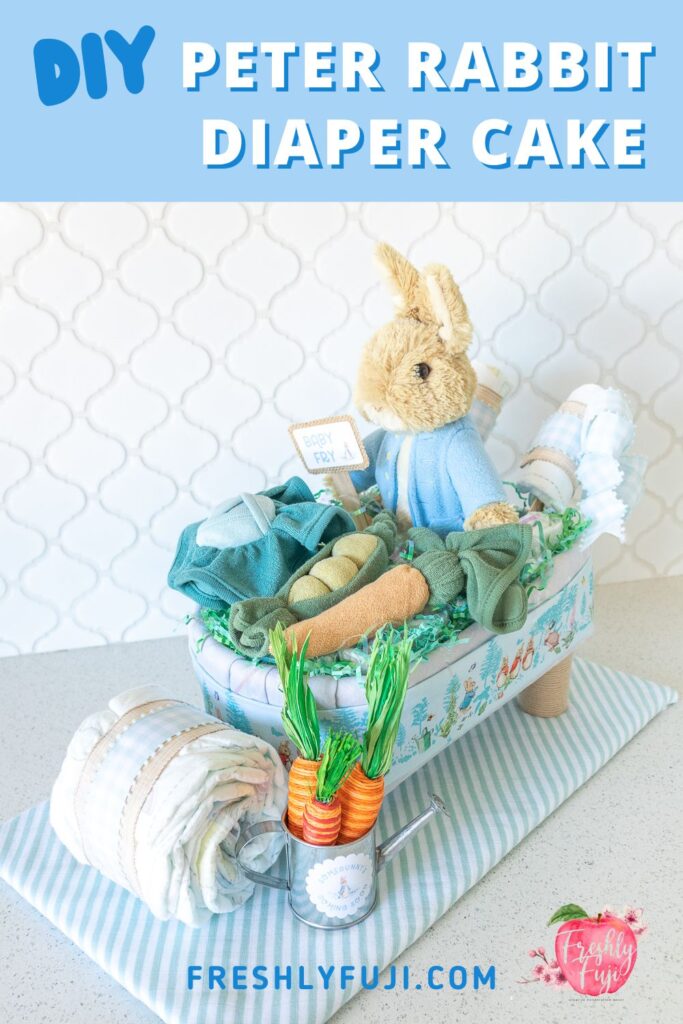
SAVE THIS PIN!
This post contains affiliate links. If clicked, I may make a small commission at no cost to you. As an Amazon affiliate, I earn from qualifying purchases.
SUPPLIES
MATERIALS
Cardboard box
Muslin baby blankets (exact) – gray for wheelbarrow tray, green for grass
Small round pan or round food container
Peter Rabbit plush (exact)
Baby washcloths (exact)
Diapers – I used one pack of size 2 diapers for the wheelbarrow diaper cake, but you may need more or less depending on the size of your cake.
2.5” solid ribbon (similar)
1.25” wired, printed ribbon (similar)
Peter Rabbit fabric (exact)
Easter grass
Yarn or twine
Foam poster board
Cardboard tubes
Tennis ball
1″ wooden beads (3)
2 jumbo craft sticks
1 large craft stick
Cardstock
Burlap
Watering can
Decorative carrots
TOOLS
Scissors
Ruler
Hot glue gun
Masking tape
Double-sided scrapbook tape
Rubber bands
HOW TO MAKE A WHEELBARROW DIAPER CAKE
Making Wheelbarrow Diaper Cake Parts
1. MAKE THE WHEELBARROW TRAY FROM CARDBOARD
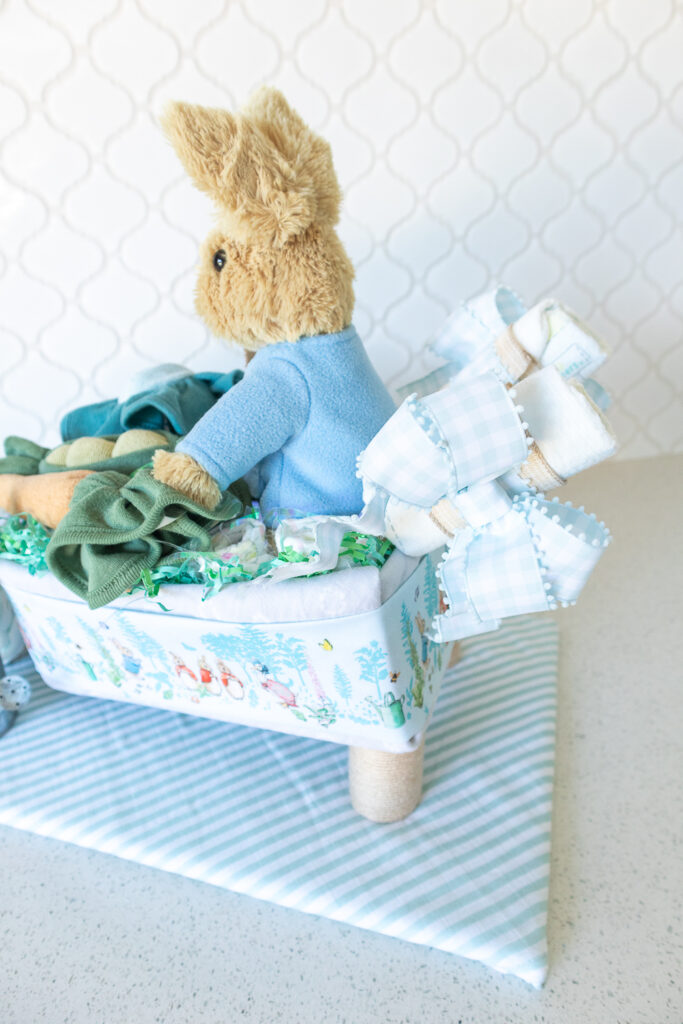
The wheelbarrow tray (the part that holds stuff) was made from a small Amazon cardboard box. You could leave the box as is (rectangle shaped), but I decided I WHEELIE (pun intended!) wanted to make it curved in the front like a real wheelbarrow! First I cut off all the flaps from the top of the box. To create the curved front, I scored vertical lines with a craft knife and ruler on one of the shorter sides of the box (this allows the cardboard to bend). Then I cut the corresponding flap down to ~½ inch and cut triangle notches along the flap every ½ inch. I folded the bottom flaps up to form the base of the tray and after playing around with the shape, secured them with masking tape. To complete the front, I added a piece of cardboard under the curved section and glued all the small flaps down with hot glue. Then I trimmed any leftover cardboard sticking out. Your wheelbarrow tray should now have a secure base.
2. Wrap the tray with a baby blanket
Once the cardboard tray was made, I wrapped it with a muslin baby blanket. There’s no wrong or right way to do this! I found that folding the blanket in half then placing the cardboard tray in the center diagonally worked for me. I folded the blanket corners over the sides and secured it to the bottom of the tray with masking tape. For the curved front I had to make a few pleats in the blanket before taping it down.
To tie into the theme, I also wrapped the tray in a strip of Peter Rabbit fabric. I folded over and pressed the raw edges, then used double-sided scrapbook tape to attach it to the blanket-wrapped tray. Alternatively you could use a wide ribbon or leave it plain.
3. Make the wheel out of diapers
To make the wheel, find a small round pan or round food container. Place the diapers into the container sideways, one by one, wrapping them to form a wheel. Secure the middle of the diaper wheel with several rubber bands. To cover the rubber bands, I layered two wire ribbons (the 2.5″ solid one and 1.5″ printed one) and secured them in place with double-sided scrapbook tape.
4. Make the wheelbarrow handles
For the handles, I used two diapers and two jumbo craft sticks. I wrapped one diaper around the end of a craft stick and secured it in place with a rubber band. Repeat for the second handle. I finished the handles by wrapping them in the same two wired ribbons I used for the wheel, then attached matching bows for added charm.
5. make the wheelbarrow legs
To make the wheelbarrow legs, I used cardboard tubes and beige yarn. From the cardboard tubes, I cut three legs – a shorter piece for the front and two longer pieces for the back. I found cutting the top of the back legs at a slight angle gave it more contact with the bottom of the tray. Each cardboard leg was wrapped with yarn using some hot glue to keep it in place.
6. MAKE VEGETABLES OUT OF WASHCLOTHS
The vegetables were made out of baby washcloths. I wish I could share photos of the process, but it honestly was a trial and error process of looking at photos on Pinterest and trying to replicate them! I’ll try my best to describe the process below. If you are really struggling to make them, you could consider purchasing them pre-made (definitely more expensive!) or purchasing a pattern (especially if you’ll be making these frequently).
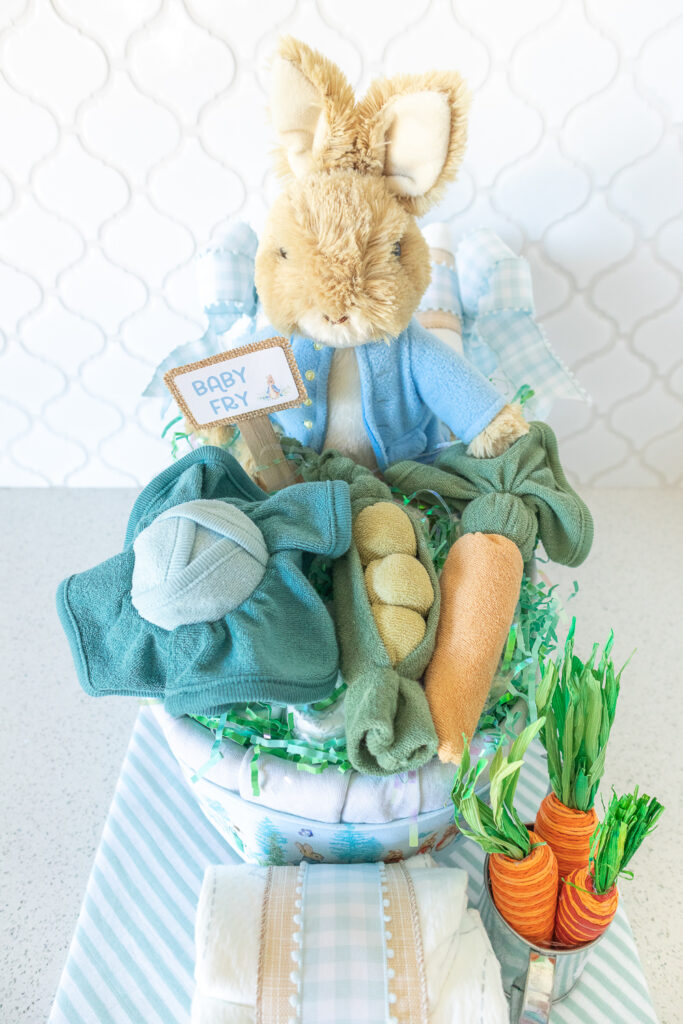
Blue cabbage – For the blue cabbage I used two washcloths – a light blue one for the inner leaves and a teal one for the outer leaves. To make the inner leaves, I wrapped the light blue washcloth around a regular-sized tennis ball, overlapping the corners to look like the center of a cabbage. I held the “leaves” in place with sewing pins (pushed directly into the ball) and rubber bands. Next I placed the inner leaves piece in the center of the teal washcloth. I folded in the corners of the teal washcloth while forming four pleats. I secured the outer leaves with another rubber band. Don’t worry about this rubber band being visible – the leaves will cover it!
Carrot – For the carrot I used two washcloths – an orange one for the carrot, and a green one for the leaves. To make the carrot, I folded the left bottom corner of the washcloth almost to the top right corner leaving a ~1 inch gap on the top and right sides. Next I folded the bottom right corner up and rolled it towards the left side to form a cone shape. Hold the bottom part of the cone and place the green towel over the top. Wrap a rubber band over the green washcloth covering the top of carrot. Now flip over the carrot so the seam where the orange and green towels meet are exposed and pull the green washcloth upward. Secure the leaves upward (close to the base of the carrot) with a clear elastic band.
Pea pod – For the peas in a pod I used two washcloths – a light green one for the peas and a dark green one for the pod. For the peas, I rolled 3 wooden 1 inch beads in a light green washcloth, securing the ends and spaces between the beads with clear elastic bands. This is what gives it the round peas shape. For the pod, I folded in opposite corners of the dark green washcloth to meet at the middle, then placed the peas inside. For the bottom of the pea pod, I folded up the end of the dark green washcloth to cover the peas and secured it with a clear elastic band. For the pea pod tendrils, I took the opposite loose corner and twisted it tightly while wrapping it with several clear elastic bands.
7. MAKE A PLANT LABEL
For the plant label sign in the wheelbarrow, I printed “Baby Fry” and a Peter Rabbit image on a piece of cardstock. The label was attached to a piece of burlap (with the scrapbook tape), then attached to a smaller craft stick.
8. DECORATE THE WATERING CAN
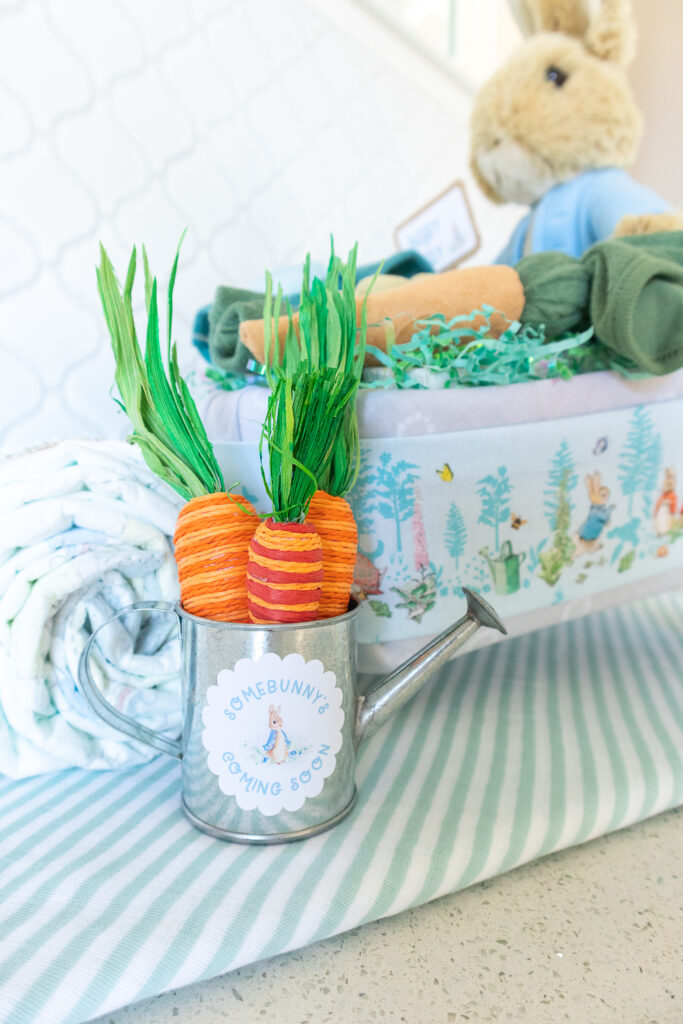
I labeled the watering can with a scalloped label made with my Cricut machine and inserted three carrots I found on clearance after Easter.
9. MAKE “GRASS” DIAPER CAKE BASE
Place the wheelbarrow tray and wheel onto a foam board and draw a larger rectangle around them for the grass. Cut out this rectangle using the edge of a ruler and a craft knife. Next I folded the striped green blanket and placed the foam board in the center on a diagonal. Then I folded over the corners of the blanket and used masking tape to attach it to the bottom of the board. This allows the board to be more flat and also gives it fun diagonal stripes!
Assembling the Wheelbarrow Diaper Cake
1. INSERT PLUSH
Place the plush into the back of the wheelbarrow tray.
2. FILL WHEELBARROW
Roll the remaining diapers into tight cylinders, securing each with an elastic band in the middle. Insert the diapers vertically into the wheelbarrow until the tray is full and the plush animal is secured. Cover the diaper cake with Easter grass, sticking some in the spaces between diapers.
3. INSERT HANDLES
Insert the bottom of the handles into the back of the wheelbarrow at an angle, sandwiching it between the plush and other diapers.
4. ADD CARDBOARD LEGS
Place the tray onto the foam board base. Place the short leg under the front of the wheelbarrow tray and place the two longer legs under the back corners.
5. PLACE DIAPER WHEEL
Place the wheel right in front of the wheelbarrow tray.
6. TOP WITH WASHCLOTH VEGETABLES
Place the washcloth vegetables on top of the diapers and easter grass.
7. ADD SIGN AND WATERING CAN
Stick plant label sign in between the diapers and place the watering can next to the wheelbarrow.
ADMIRE YOUR ADORABLE DIAPER CAKE!
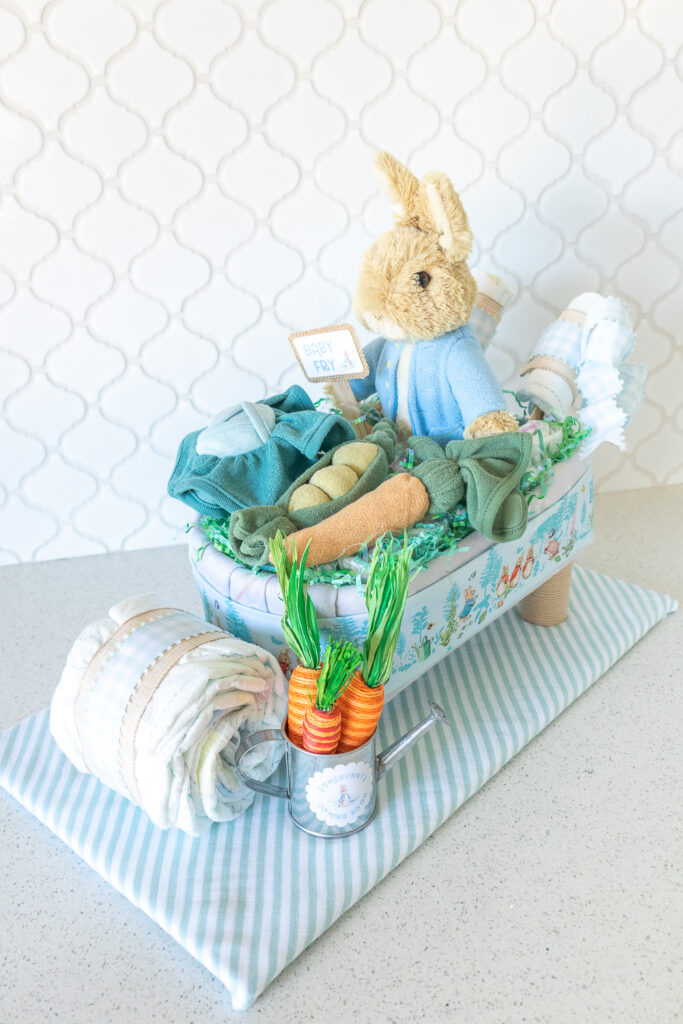
Tell me this isn’t the cutest diaper cake you’ve ever seen! If you make something similar, tag me in your photos on Instagram. I would love to see what you create!
If you’re looking for more baby shower inspiration, check out this Pink and Yellow Lemon Baby Shower and matching Lemon Curd Favors blog posts.
